¶ Receiving
Standalone Training Guide
Version: 20260707
This guide explains the Advanced Receiving workflow in AssetTrack. It covers selecting a receiving location, optionally applying bulk fields, scanning received items, reviewing scanned items before submission, submitting for processing, and confirming that assets and receiving lifecycle events were created.
¶ Contents
- Receiving Overview
- Opening Advanced Receiving
- Selecting a Receiving Location
- Using Bulk Fields
- Scanning Received Items
- Reviewing Scanned Items Before Submit
- Submitting Receiving for Processing
- Confirming Created Assets and Lifecycle History
- Quick Reference
Related guide: This guide focuses on the Advanced Receiving display form. General list behavior, form fields, reference previews, Query Builder, and Column Selector are covered in the Lists, Records, and Field guide.
¶ Receiving Overview
Advanced Receiving is used to receive physical assets into AssetTrack. Users can receive assets into a selected location, optionally set common field values up front, scan or type received item tags, review the scanned item records, and submit the receiving action to generate asset records.
Important: Scanned Items are not actual asset records yet. They are placeholder records that hold scanned values and field values while the receiving action is being prepared. Assets are created only after the receiving action is submitted and processed.
| Receiving concept | Meaning |
|---|---|
| Receiving Location | The location where the received assets should be placed. |
| Bulk Fields | Optional shared values applied to scanned items as they are scanned, such as Model, Vendor, Manufacturer, Lease Contract, and Warranty Contract. |
| Scan Tag | The field used to type, paste, or scan tag values for received items. |
| Scanned Items | Placeholder records created as tags are scanned before final Submit. |
| Submit | Finalizes receiving and sends the scanned items for processing into assets. |
¶ Opening Advanced Receiving
Navigate to AssetTrack > Receiving in the left navigation menu. The Advanced Receiving page opens as a display form. The top of the page contains the Using PO toggle, Receiving Location field, Scan Tag field, barcode scanner icon, Bulk Fields button, and Submit button. The main list area is labeled Scanned Items. The right side of the page includes instructions and a chronological scan log.
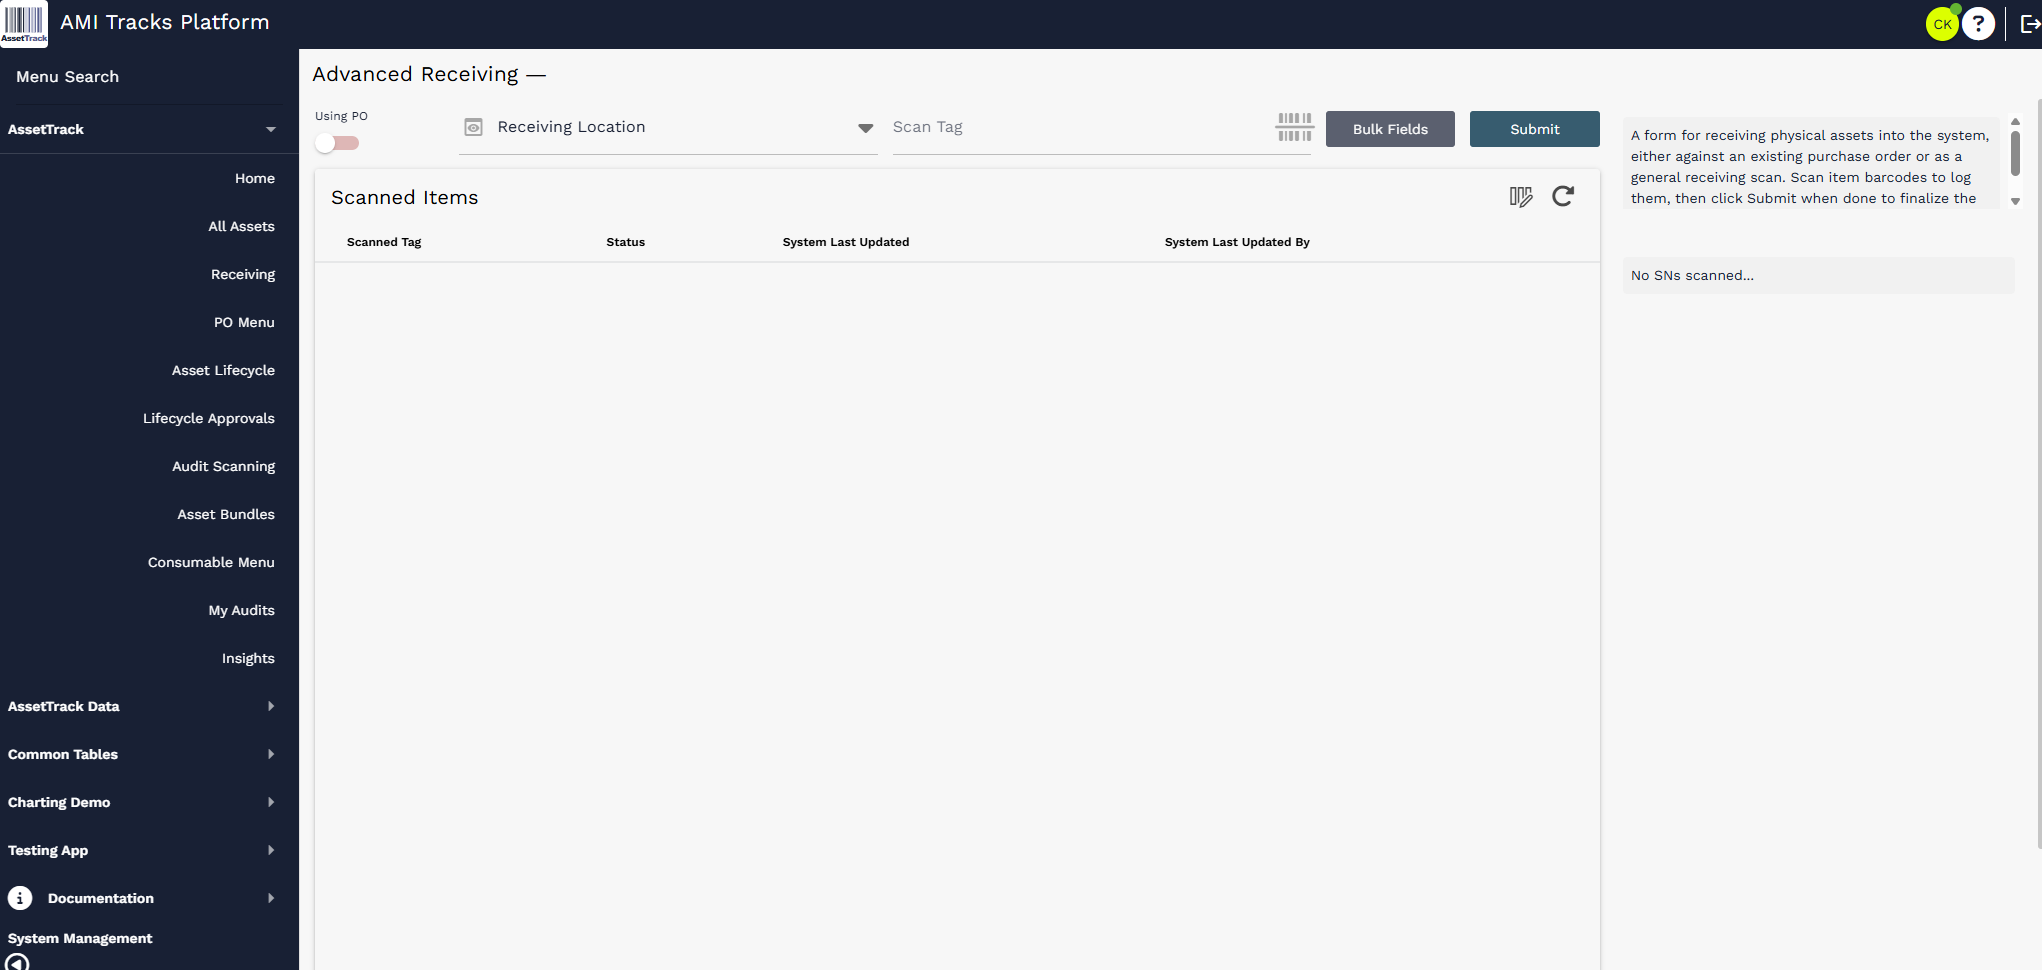
Advanced Receiving display form before any items have been scanned.
Using PO: The screenshots in this guide show a general receiving workflow. Receiving may also be used against an existing purchase order depending on the customer workflow and configuration.
¶ Selecting a Receiving Location
Before scanning items, select the location where the assets are being received. Use the Receiving Location dropdown to choose the destination location. This location will populate onto scanned items and, after submission, onto the created assets.
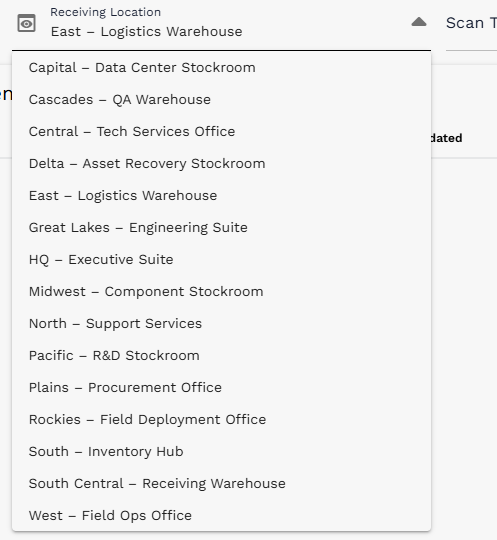
Receiving Location dropdown with available receiving locations.
¶ Using Bulk Fields
Bulk Fields are optional. They are useful when multiple received items share the same values. Set bulk fields before scanning so the selected values automatically populate on each scanned item.

Bulk Fields button on Advanced Receiving.
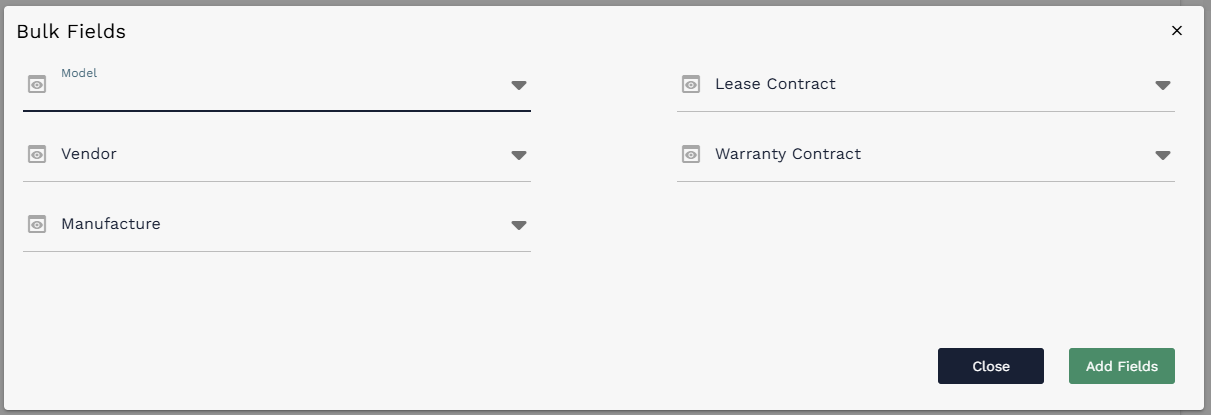
Bulk Fields dialog before values are selected.
Available bulk fields include Model, Vendor, Manufacturer, Lease Contract, and Warranty Contract. Users can set no bulk fields, all bulk fields, or only the fields that apply to the current receiving session. After filling out the desired fields, select Add Fields.
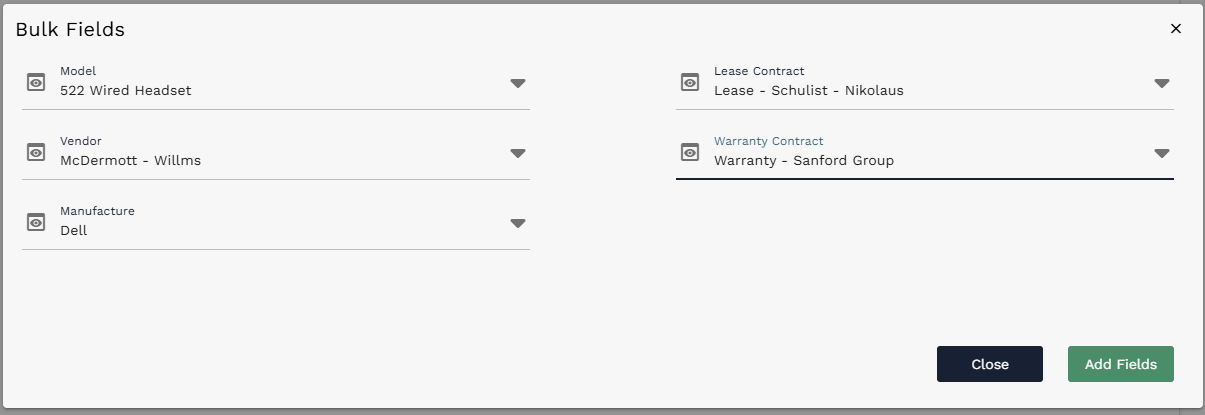
Bulk Fields dialog populated with Model, Vendor, Manufacturer, Lease Contract, and Warranty Contract values.
After Bulk Fields are added, AssetTrack displays a confirmation message indicating that the bulk fields were updated. Any items scanned after this point will receive those values automatically.
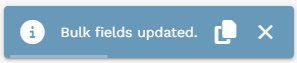
Bulk fields updated confirmation message.
Tip: Bulk field values can still be changed later on individual scanned items before submitting. This is useful when most received items share the same values but one or two need corrections.
¶ Scanning Received Items
After selecting a receiving location and any desired bulk fields, begin scanning received items. Users can paste or type values into the Scan Tag field and press Enter, or use the barcode scanner icon to scan with a mobile camera or desktop scanner.
As items are scanned, Scanned Items are added to the list. The right-side log also shows scanned values in chronological order so users can see the scan activity from the current session.
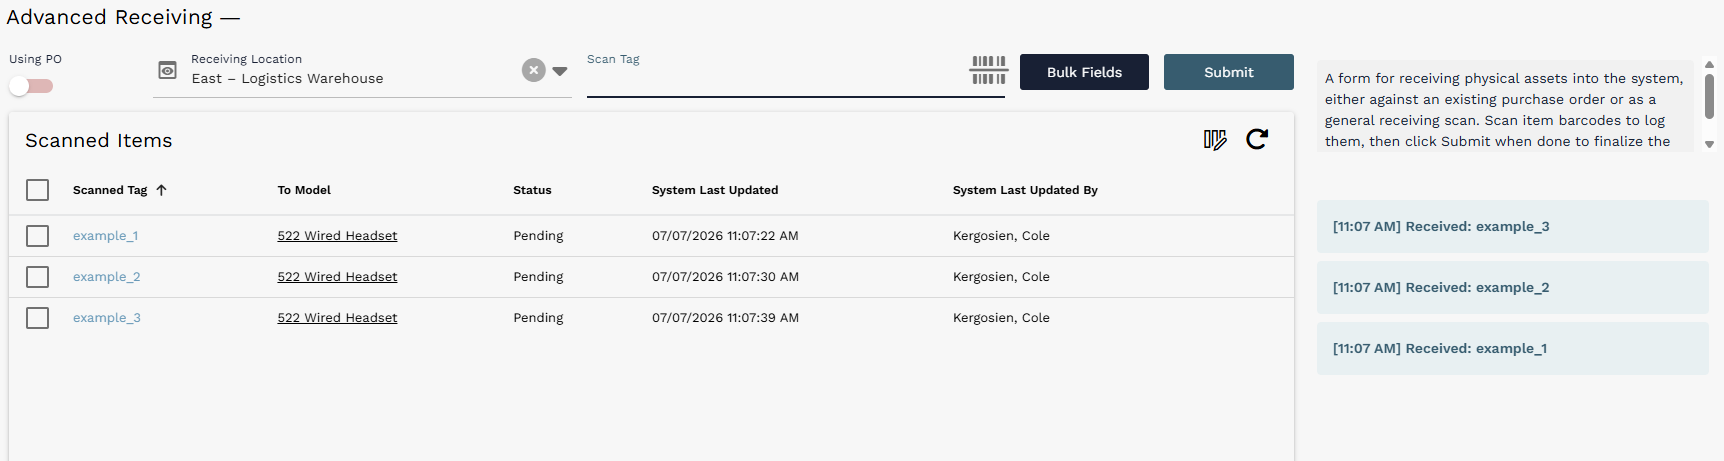
Advanced Receiving after three scanned items have been added. The scan log on the right shows the scanned values chronologically.
Important: At this stage, the rows in Scanned Items are still placeholder records. They hold the scan tag and field values pending the Submit action.
¶ Reviewing Scanned Items Before Submit
Before submitting, users can open scanned items to review or update their values. This is the opportunity to correct any scanned item data before real asset records are created.
In the Edit Transaction dialog, the Scan Tag value has been copied into the Serial Number field, and the bulk field values have been brought over from the Bulk Fields dialog. If the item has a specific Asset Tag, enter it here before submitting. Select Update to save changes to the scanned item.
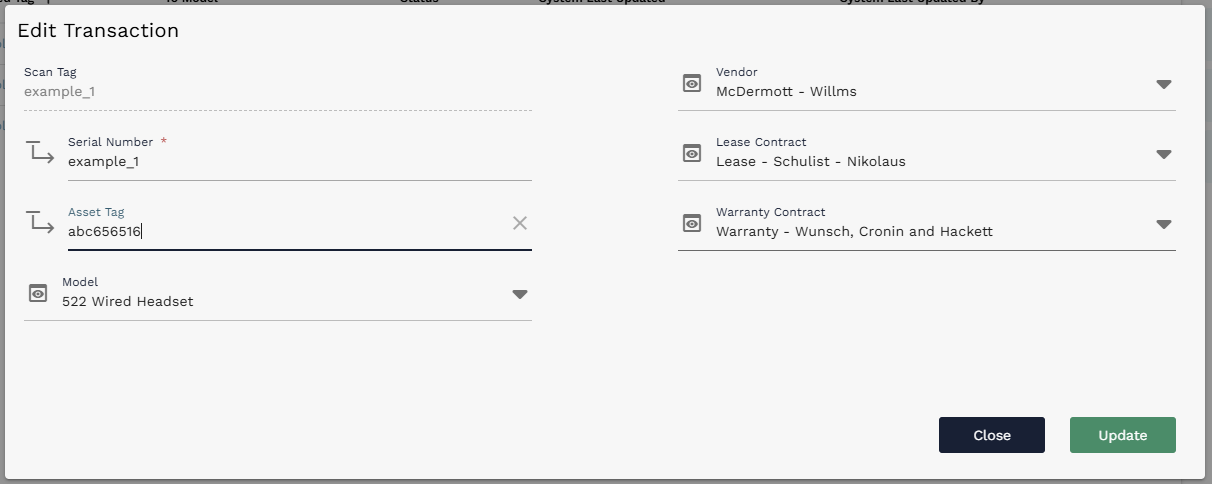
Edit Transaction dialog showing Scan Tag, Serial Number, Asset Tag, Model, Vendor, Lease Contract, and Warranty Contract values before Submit.
¶ Submitting Receiving for Processing
After reviewing the scanned items, select Submit to finalize the receiving action. AssetTrack displays a processing message while the receiving submission is handled.

Submit button on Advanced Receiving.

Submitted for processing confirmation message.
Approval note: In some circumstances, assets may not be created immediately after a receiving action is submitted. AssetTrack can be configured to require AssetTrack Manager review between receiving and asset creation. If this applies, review the AssetTrack - Approvals guide for the approval workflow.
¶ Confirming Created Assets and Lifecycle History
To confirm that assets were created, navigate to the Asset table. The newly created assets should appear with the expected Status, Location, Model, Manufacturer, Asset Type, Serial Number, Asset Tag, and other values based on the receiving data that was submitted.

Newly created received assets shown in the Asset list.
Opening one of the received assets shows the field values on the asset record. The Lifecycle History tab also shows a Received lifecycle event for the asset. This lifecycle event records the receiving action and gives users an audit trail for how the asset entered AssetTrack.
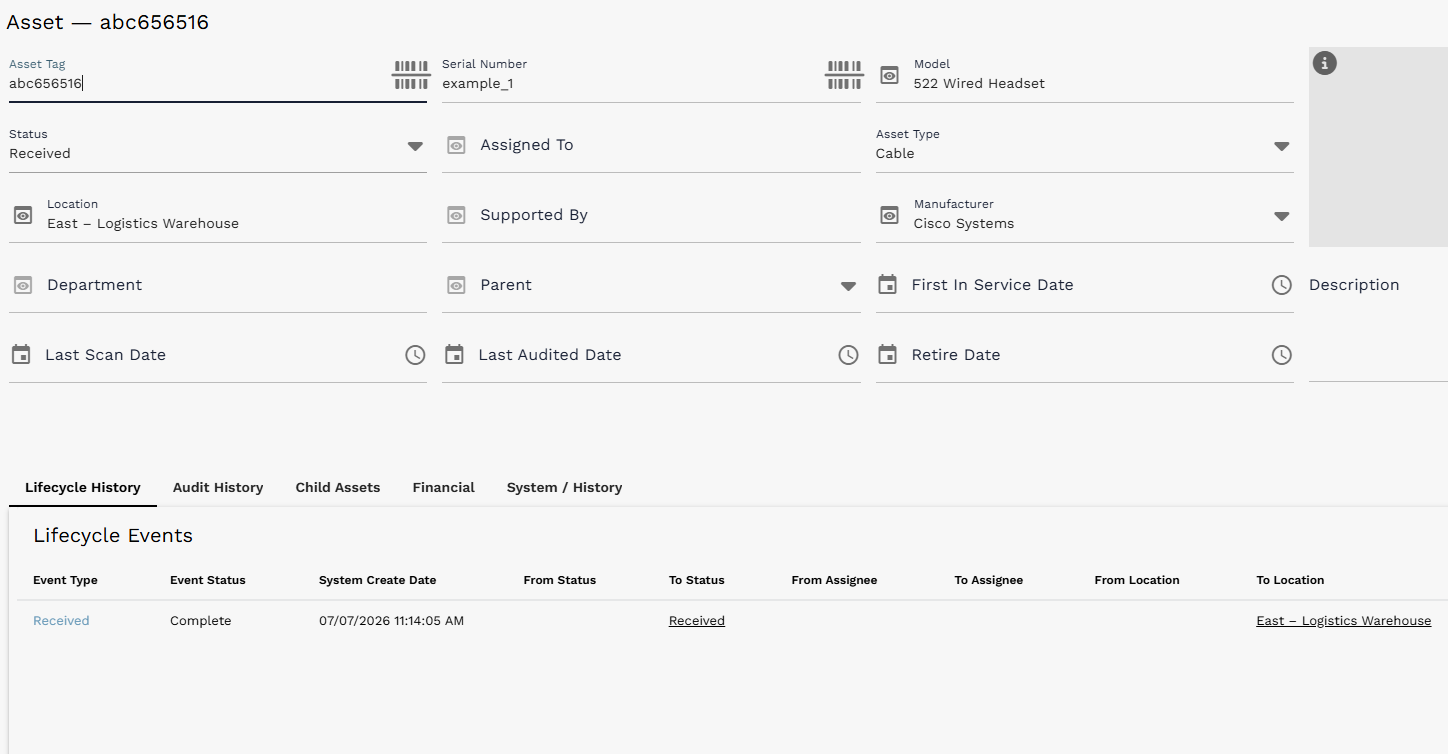
Received asset record showing received field values and a Received lifecycle event in Lifecycle History.
¶ Quick Reference
| Task | Action |
|---|---|
| Open receiving | Navigate to AssetTrack > Receiving. |
| Choose destination | Select a Receiving Location before scanning. |
| Set shared values | Use Bulk Fields to set Model, Vendor, Manufacturer, Lease Contract, and Warranty Contract for future scanned items. |
| Scan items | Paste/type values into Scan Tag and press Enter, or use the barcode scanner icon. |
| Review scanned items | Open a Scanned Item and update fields such as Asset Tag before submitting. |
| Create assets | Select Submit to send the scanned items for processing. |
| Confirm results | Review the Asset list and open created assets to verify values and Received lifecycle history. |
Recommended workflow: The safest receiving pattern is: choose location, optionally set bulk fields, scan items, review scanned items, submit, then verify the created assets.