¶ Purchase Orders
Standalone Training Guide
Version: 20260708
This guide explains the AssetTrack purchase order workflow. It is organized into two main sections: creating purchase orders and receiving against purchase orders. The first section covers creating Purchase Orders, Purchase Order Lines, and Purchase Order Line Items. The second section covers receiving expected and unexpected items against existing Purchase Orders.
¶ Contents
- Creating Purchase Orders
- Receiving Against Purchase Orders
- Purchase Order Receiving Overview
- Open Advanced Receiving in Using PO Mode
- Select a Purchase Order and Review PO Lines
- Review PO Line Items
- Scan Expected Line Items
- Receiving Status: Ordered, Partially Received, Received, and Over Received
- Unexpected Items
- Submit vs. Complete
- Verify Created Assets and Lifecycle Events
- Purchase Order Receiving Quick Reference
Guide structure: Section 1 covers PO setup and planned line items. Section 2 covers receiving physical items against those planned PO records.
¶ Creating Purchase Orders
Use this section to create the Purchase Order structure before physical items are received. The workflow starts with the Purchase Order, then moves to Purchase Order Lines, then individual Purchase Order Line Items.
¶ Purchase Order Process Overview
The purchase order workflow lets users create and manage a purchase order before received assets are entered into AssetTrack. The process starts with the Purchase Order record, then adds Purchase Order Lines, then adds individual Purchase Order Line Items.
| Record / concept | What it represents |
|---|---|
| Purchase Order | The overall order. It can include PO number, total cost, vendor, ordered date, shipping location, and expected delivery date. |
| Purchase Order Line | One row of the purchase order, generally grouped by model. For example: Latitude 9420, quantity 4, cost $2,000. |
| Purchase Order Line Item | A placeholder for an individual asset that will later be received into the system. Line items belong to a PO Line and inherit the PO Line relationship back to the PO. |
| Activity log | The right-side log tracks activity performed during the session, such as shipment info updates, created PO Lines, and added Line Items. |
Important: PO Line Items are placeholders for individual assets that will later be entered into AssetTrack. Creating PO Line Items does not by itself receive assets into the asset table.
¶ Opening the PO Menu
Navigate to AssetTrack > PO Menu. The Create Purchase Order page opens. From this page, users can select an existing PO from the Purchase Order dropdown or create a new purchase order using the plus icon beside the Purchase Order field.
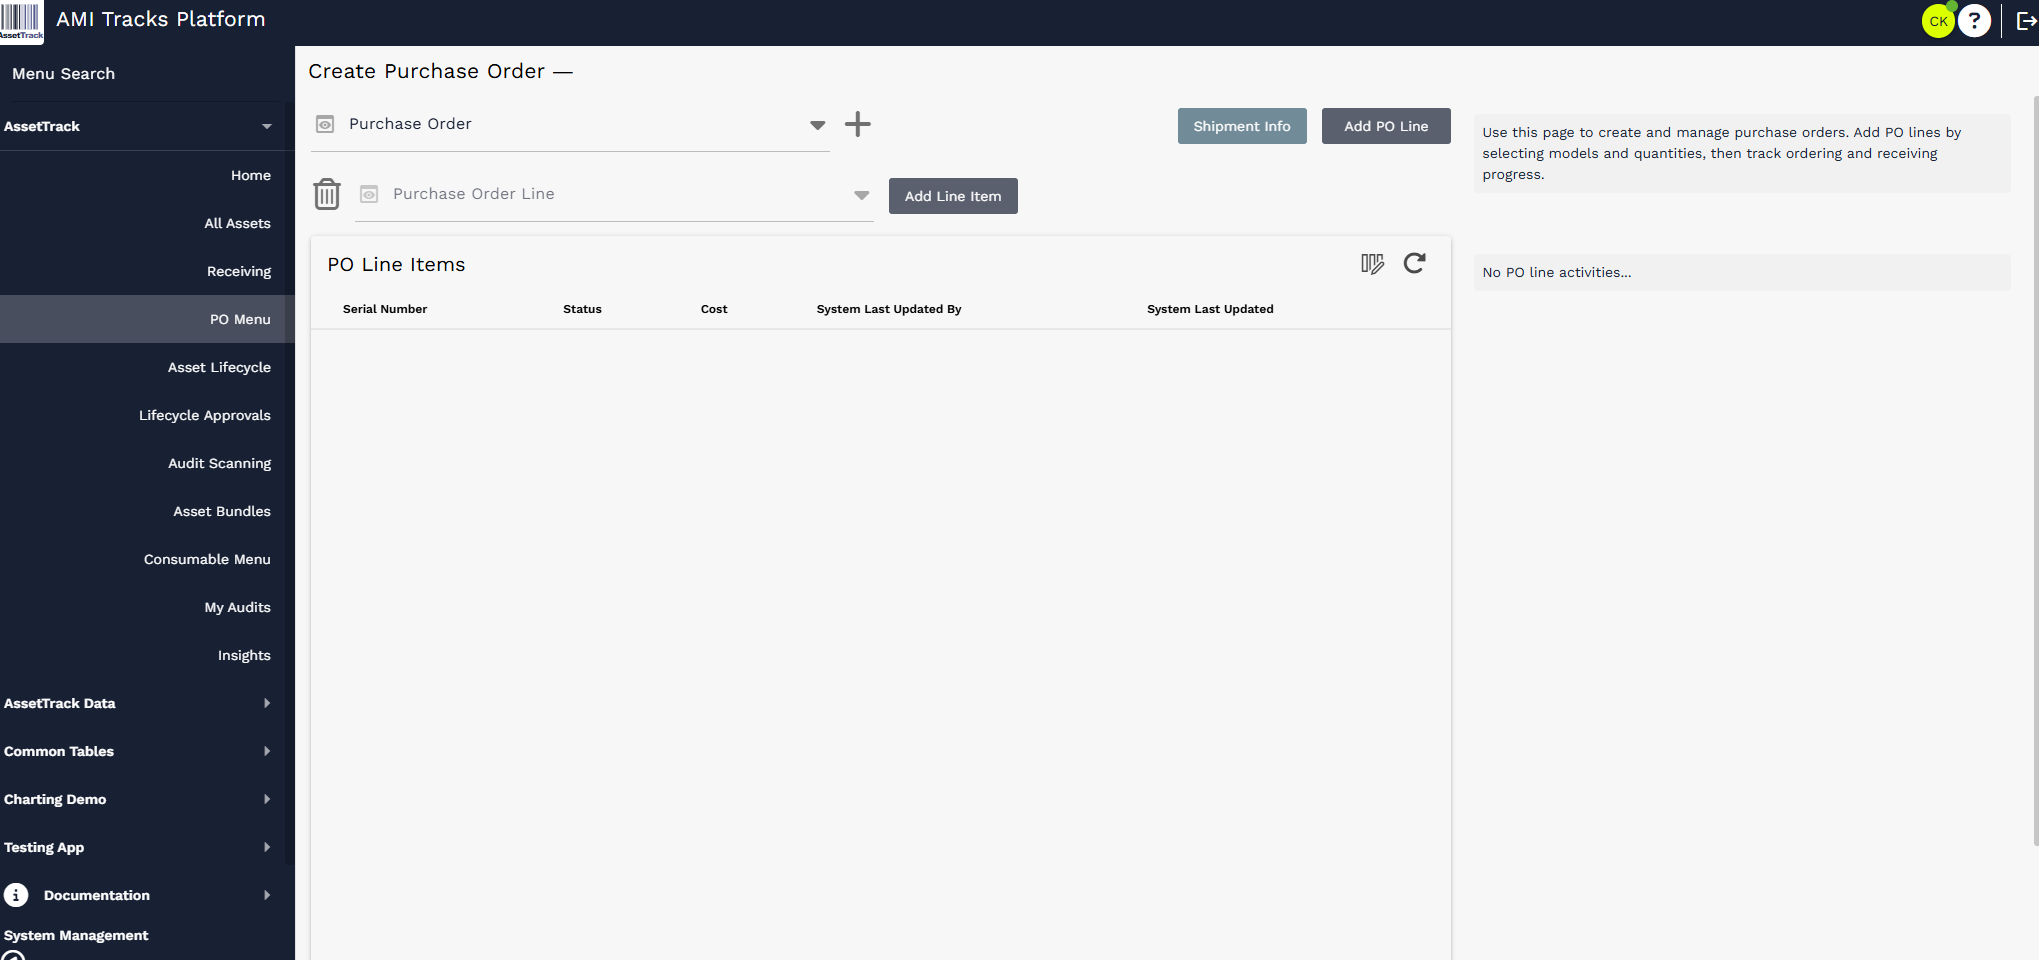
PO Menu page with Purchase Order, Purchase Order Line, PO Line Items, action buttons, instructions, and the activity log.

Purchase Order reference field with the plus icon used to create a new PO.
¶ Creating a Purchase Order
To create a new purchase order, select the plus icon beside the Purchase Order field. This opens the Create Purchase Order dialog.
The minimum required field is PO Number. Users can also populate Total Cost, Ordered Date, Vendor, Shipping Location, and Expected Delivery Date.
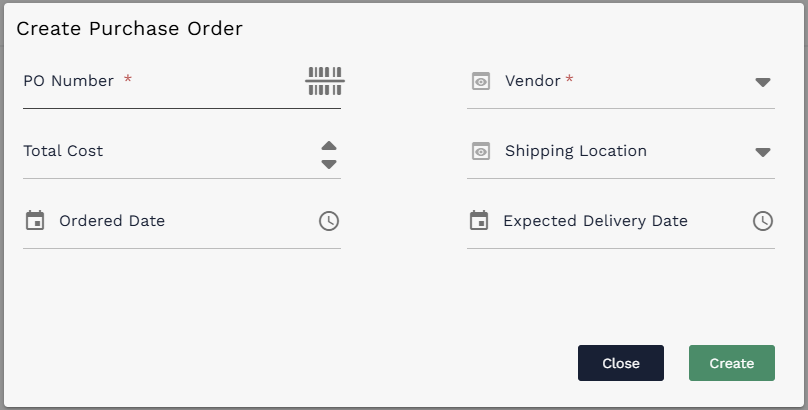
Create Purchase Order dialog before values are entered.
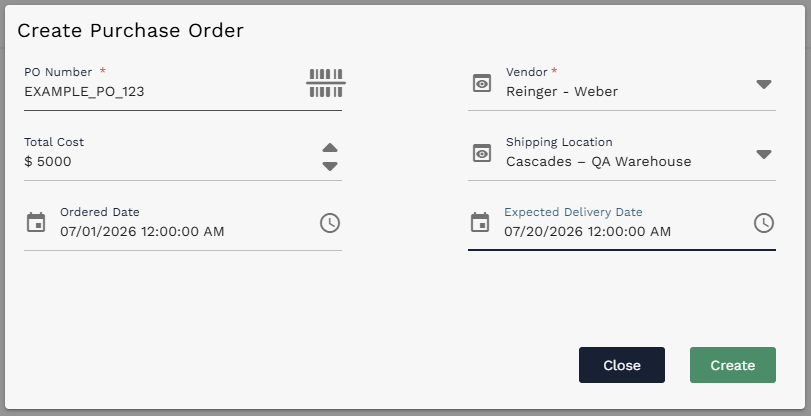
Create Purchase Order dialog with PO Number, Total Cost, Ordered Date, Vendor, Shipping Location, and Expected Delivery Date populated.
After entering the purchase order information, select Create. The newly created purchase order automatically populates in the Purchase Order reference field on the PO Menu page.

Purchase Order reference field populated with the newly created PO.
¶ Adding Shipment Information
After the purchase order is created, select Shipment Info to add or update shipment-related details. Shipping Location and Expected Delivery Date may populate automatically if they were already provided when the PO was created. Additional shipment fields include Tracking Number, Shipment Carrier, and Shipped Date.
Shipment Info button.
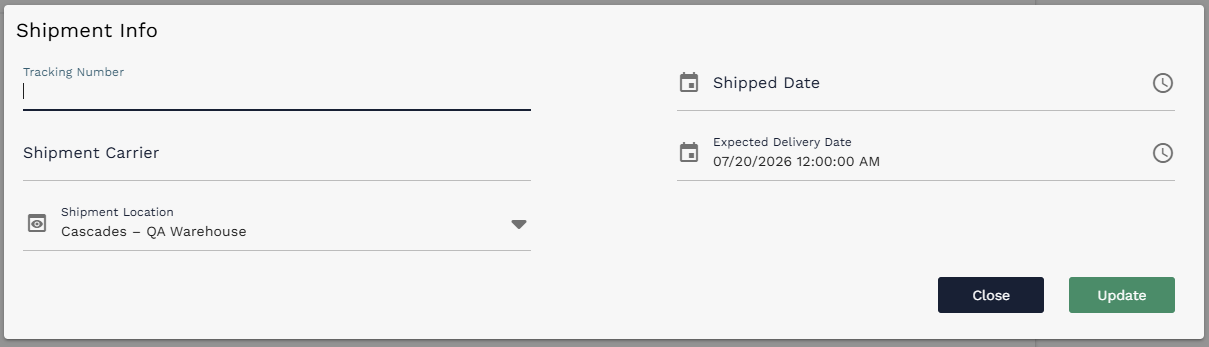
Shipment Info dialog with tracking number, carrier, shipment location, shipped date, and expected delivery date fields.
If shipment information is updated, the right-side activity log records that update for the current session.
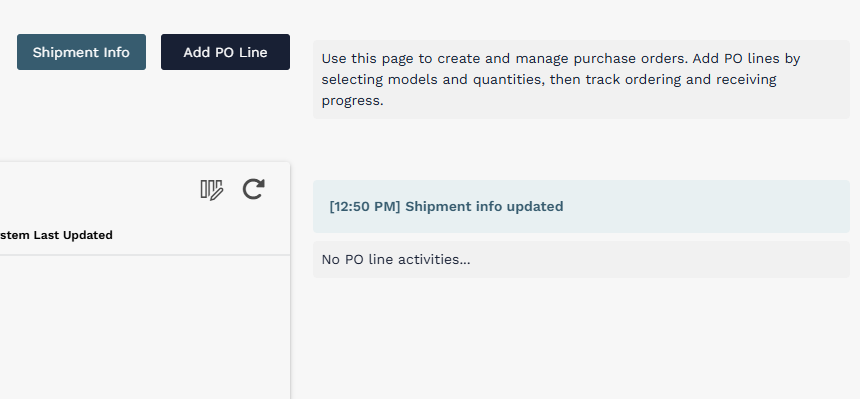
Activity log entry showing shipment info updated.
¶ Creating Purchase Order Lines
A Purchase Order Line represents one row of the purchase order. Items are generally grouped on these lines by model. For example, one PO Line might represent Dell laptops with a quantity of 4 and a total cost of $2,000.
To create a PO Line, select Add PO Line. The Create PO Line dialog opens with fields for Model, Quantity, and Cost.
Add PO Line button.
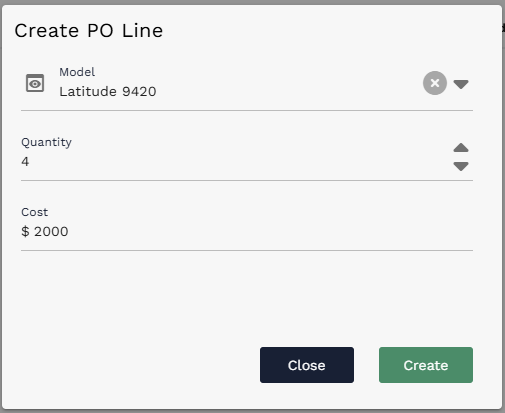
Create PO Line dialog with Model, Quantity, and Cost populated.
Select Create to create the PO Line. Unlike many dialogs, the Create PO Line dialog stays open after Create is selected. It clears the field values so the user can create multiple PO Lines in one session. When all needed PO Lines have been created, select Close to exit the dialog.
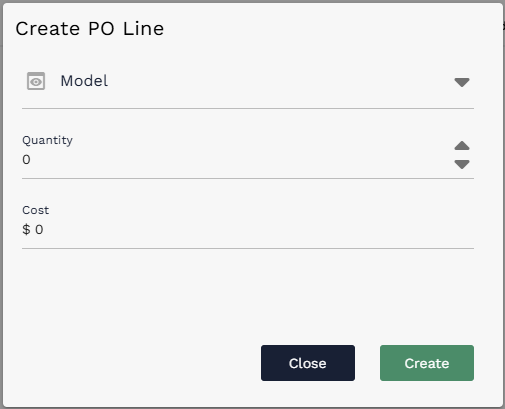
Create PO Line dialog after values clear for another PO Line entry.
The activity log on the right tracks the PO Lines created during the session.
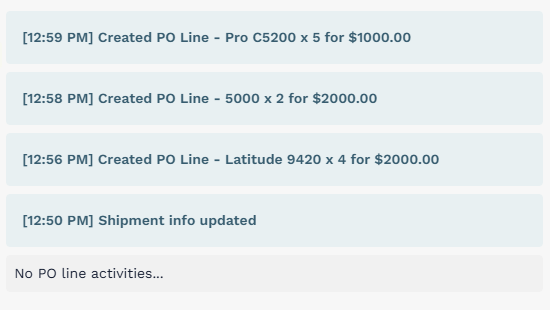
Activity log showing multiple PO Lines created during the session.
¶ Creating Purchase Order Line Items
After PO Lines are created, add PO Line Items. PO Line Items represent the individual assets expected under a PO Line. All line items under the same PO Line share the same model and are related back to that PO Line, which is itself related back to the Purchase Order.
First, select the Purchase Order Line that should receive the new line items. Then select Add Line Item.

Purchase Order Line selected with Add Line Item available.

Add Line Item button.
The Add Line Items dialog opens with fields for Serial Number and Cost. Enter the individual line item data, then select Add Item.
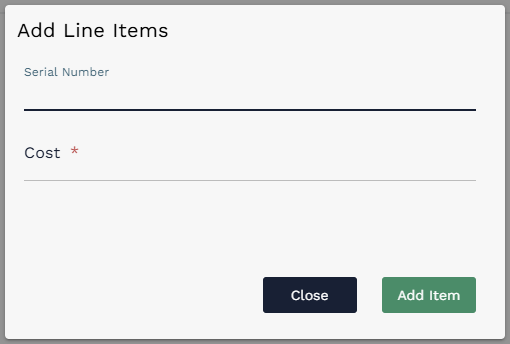
Add Line Items dialog before data entry.
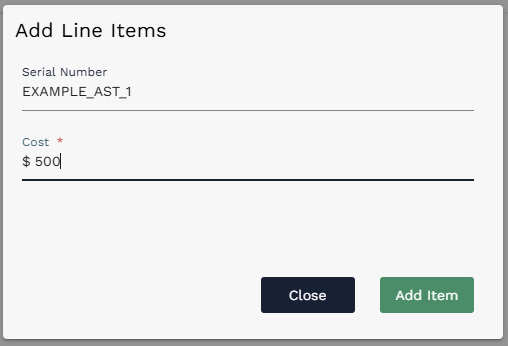
Add Line Items dialog with Serial Number and Cost populated.
Dialog behavior: The Add Line Items dialog also remains open after Add Item is selected. It clears field values so multiple line items can be entered quickly. Select Close when done adding line items for that PO Line.
The activity log tracks the line items that were added, along with the model they belong to.
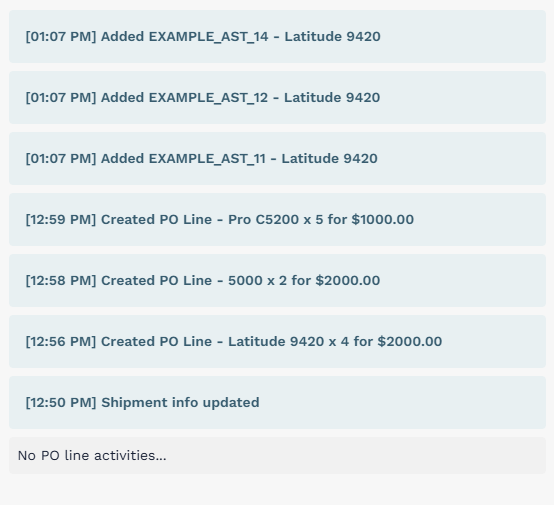
Activity log showing line items added under the selected PO Line.
¶ Reviewing PO Line Items
After line items are added, they appear in the PO Line Items related list. The list shows information such as Serial Number, Status, Model, Purchase Order Line, Cost, System Last Updated By, and System Last Updated. Normal list controls such as refresh and column selection are available.
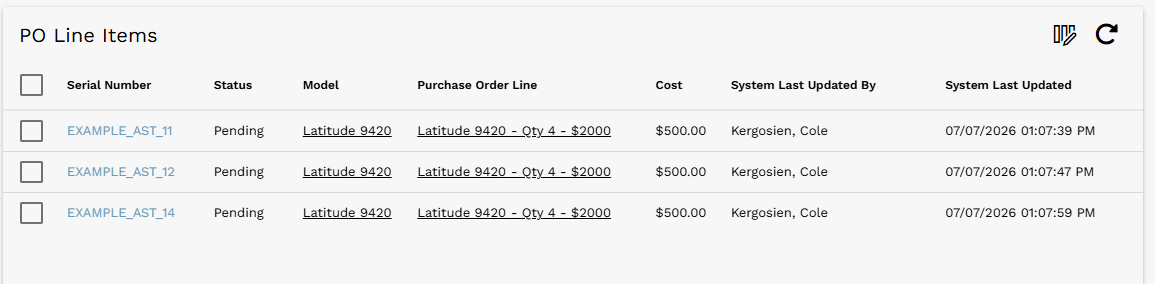
PO Line Items related list showing individual pending line items under the selected PO Line.
If there are additional PO Lines, change the Purchase Order Line reference and repeat the Add Line Item process as many times as needed.
¶ Creating Purchase Orders Quick Reference
| Task | Action |
|---|---|
| Create a Purchase Order | Open PO Menu, select the plus icon beside Purchase Order, enter at least PO Number, then select Create. |
| Update shipment info | Select Shipment Info, enter tracking/shipping details, then select Update. |
| Create a PO Line | Select Add PO Line, enter Model, Quantity, and Cost, then select Create. |
| Create multiple PO Lines | After each Create, the dialog stays open and clears values. Continue entering lines, then select Close. |
| Add PO Line Items | Select a Purchase Order Line, select Add Line Item, enter Serial Number and Cost, then select Add Item. |
| Review Line Items | Use the PO Line Items list to confirm Serial Number, Status, Model, Purchase Order Line, and Cost. |
¶ Receiving Against Purchase Orders
This section explains how to receive assets against existing Purchase Orders in AssetTrack. It assumes the Purchase Order, PO Lines, and PO Line Items have already been created. The PO creation workflow is covered earlier in this guide.
¶ Purchase Order Receiving Overview
Receiving against a Purchase Order lets users match physical assets being received to PO Line Items that were already planned under a PO. This keeps ordering and receiving progress tied back to the PO structure.
The core receiving flow is: enable Using PO, select the Purchase Order, scan line items, review received quantities and statuses, submit the received items, and complete the PO when no additional receiving should occur.
| Concept | Meaning |
|---|---|
| Purchase Order | The overall order record. It groups PO Lines and tracks shipment and receiving progress. |
| PO Line | A row of the purchase order, generally grouped by model, quantity, and cost. |
| PO Line Item | A placeholder for an individual physical item expected under a PO Line. These are commonly matched by serial number during receiving. |
| Received Asset | An Asset record created after received items are submitted and processed. |
¶ Open Advanced Receiving in Using PO Mode
Navigate to the Receive menu item under the AssetTrack menu. This opens the Advanced Receiving page. To receive against a Purchase Order, turn on the Using PO toggle at the top of the form.
Using PO mode changes the page to a PO-focused layout. Instead of general scanned items, the main list shows Purchase Order Lines for the selected PO.
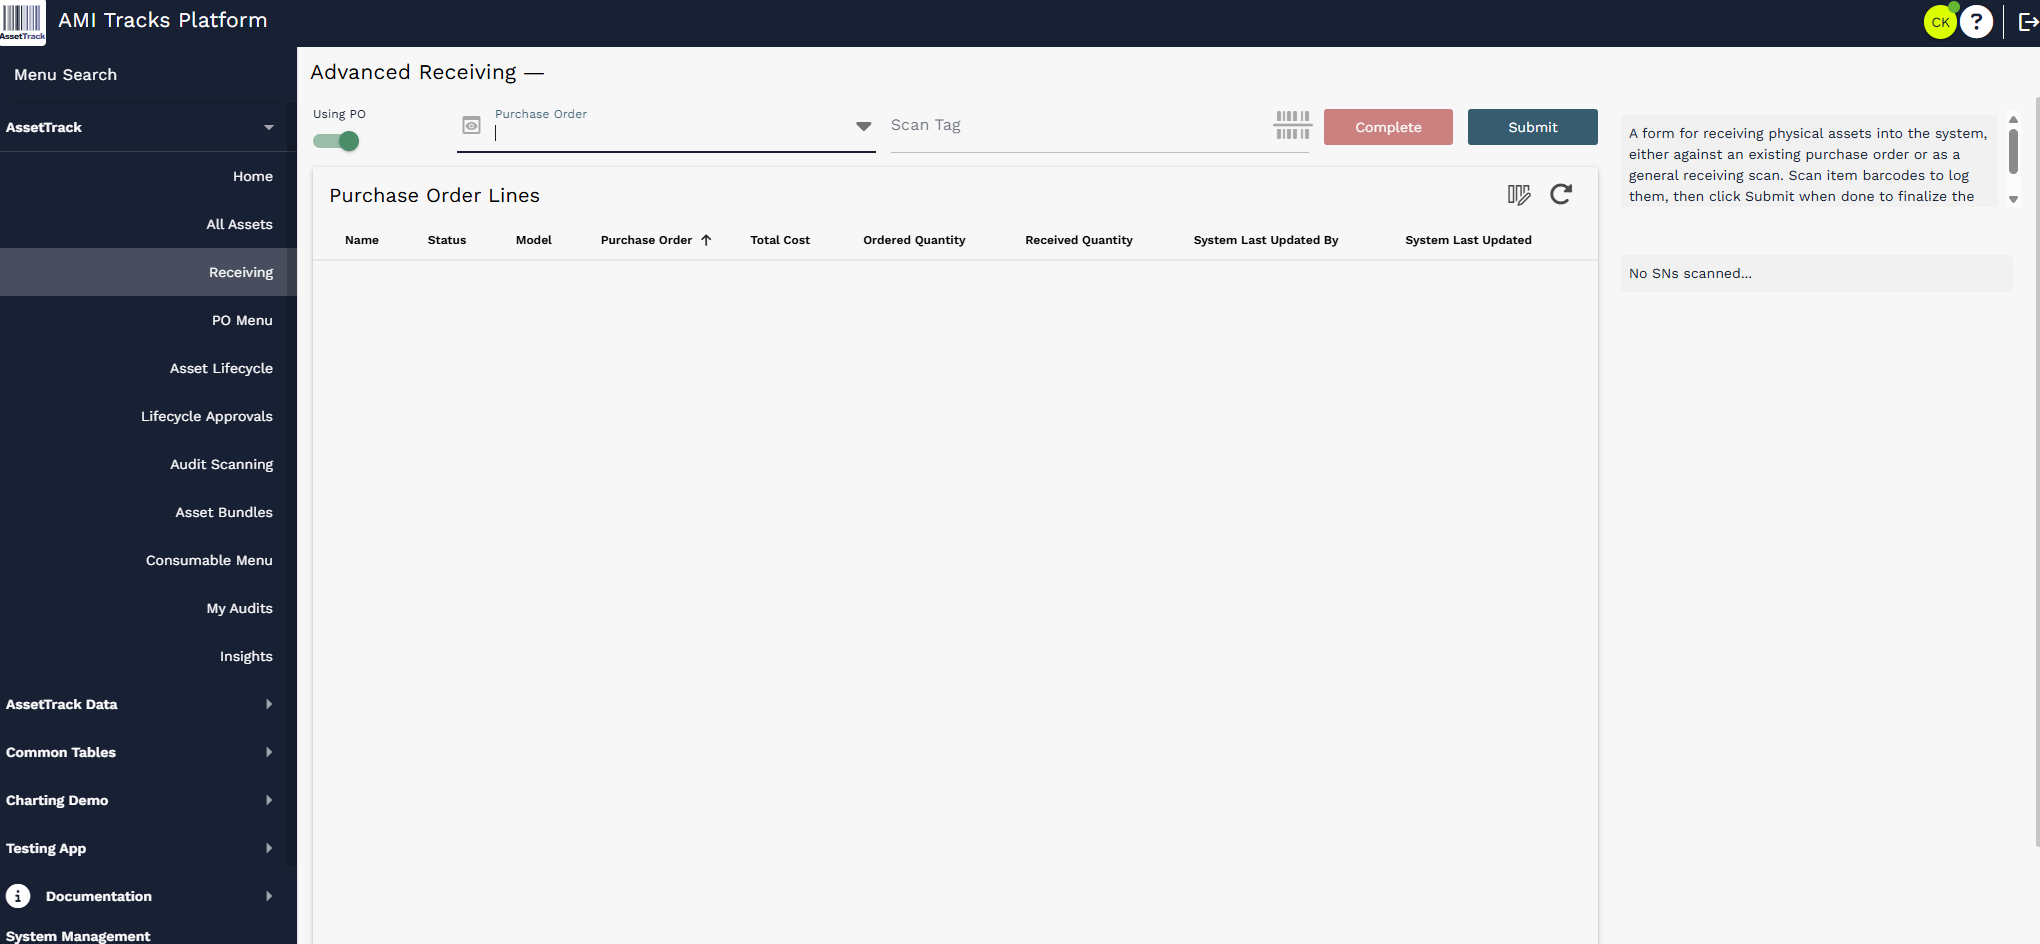
Advanced Receiving page with Using PO enabled and the Purchase Order field ready for selection.
¶ Select a Purchase Order and Review PO Lines
Select the Purchase Order to receive against. Once a PO is selected, related Purchase Order Lines populate in the list. This view is useful because it shows Ordered Quantity and Received Quantity for each PO Line, along with the current receiving status.
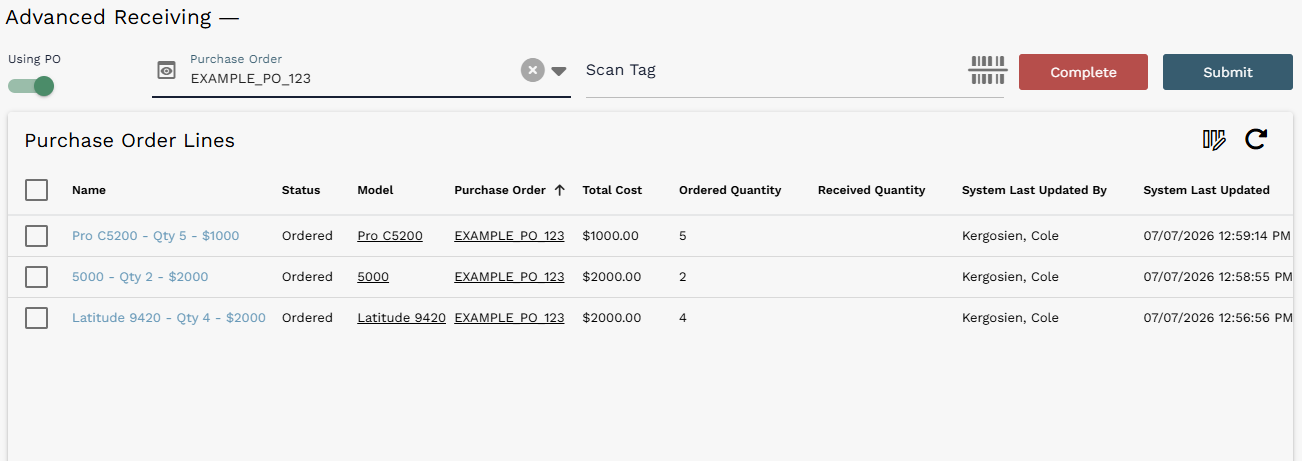
Purchase Order Lines populated after selecting EXAMPLE_PO_123.
Use the Purchase Order Lines list to understand what is expected before scanning begins. In the example, the PO includes multiple PO Lines, each with its own model, ordered quantity, and received quantity.
¶ Review PO Line Items
Users can click into an individual PO Line to view the PO Line Items associated with it. This opens a Purchase Order Line Items dialog. Before receiving starts, the line items are typically in Pending status.
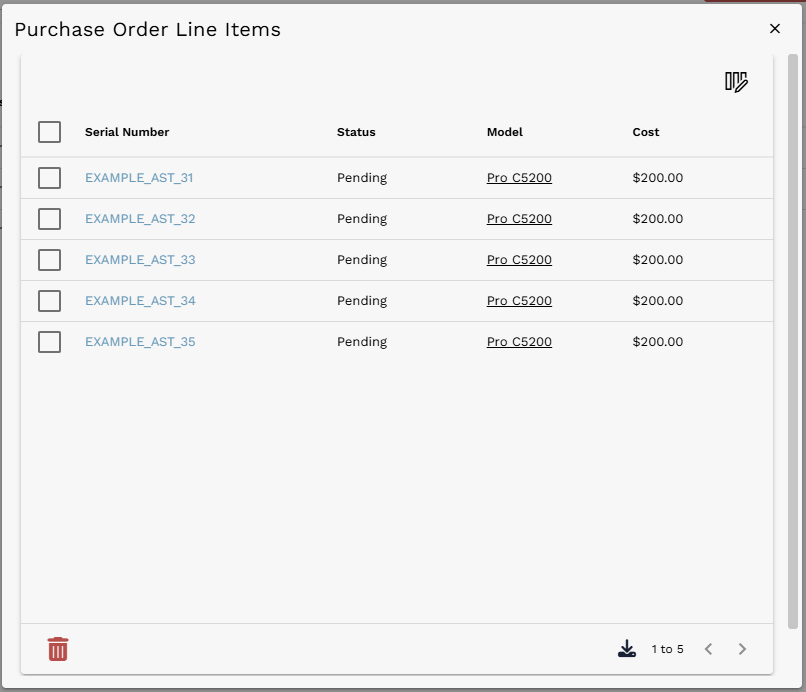
Purchase Order Line Items dialog showing pending line items for the Pro C5200 PO Line.
PO Line Item status: Pending means the line item has been created under the PO Line but has not yet been received.
¶ Scan Expected Line Items
To receive items, type or paste the serial number into the Scan Tag field and press Enter. Users can also select the barcode icon next to the field to use a mobile or desktop scanner.

Scan Tag field with an expected serial number entered.
AssetTrack automatically matches Scan Tag values against PO Line Items associated with the selected PO. As expected line items are scanned, AssetTrack updates the related line item to Received and increases the Received Quantity on the matching PO Line.
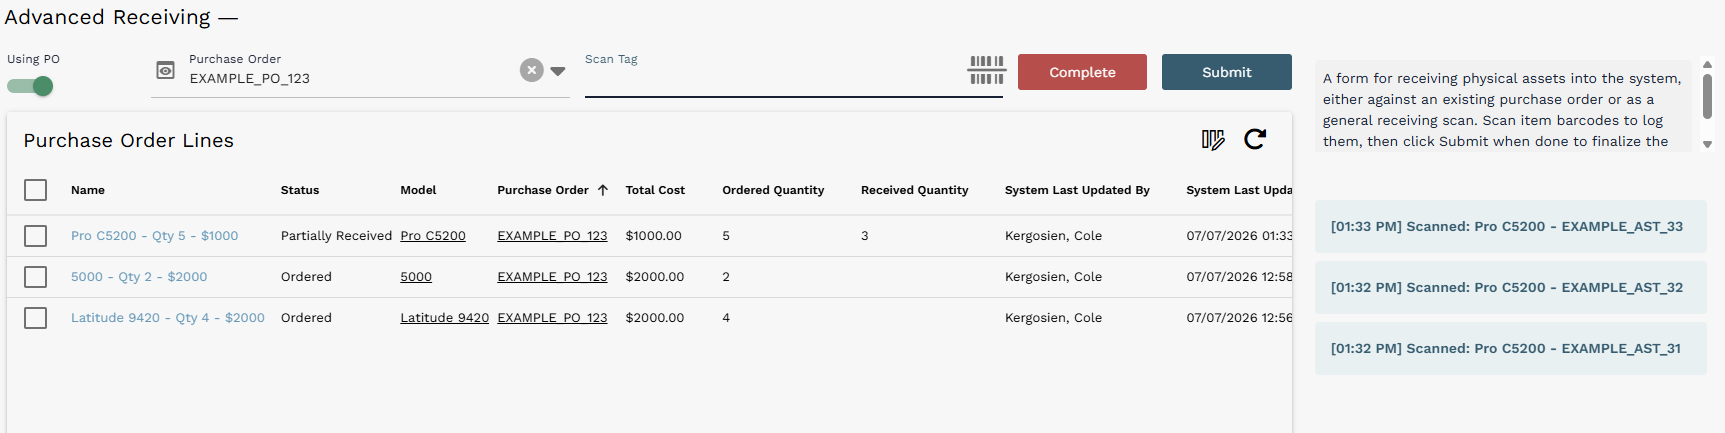
After several scans, the matching PO Line becomes Partially Received and the session log records each scan.
¶ Receiving Status: Ordered, Partially Received, Received, and Over Received
As receiving progresses, the PO Line status updates based on how many PO Line Items have been received compared to the ordered quantity.
| PO Line status | When it appears |
|---|---|
| Ordered | No items have been received for the PO Line yet. |
| Partially Received | Some, but not all, expected items have been received. |
| Received | Received Quantity matches Ordered Quantity. |
| Over Received | Received Quantity is greater than Ordered Quantity. |
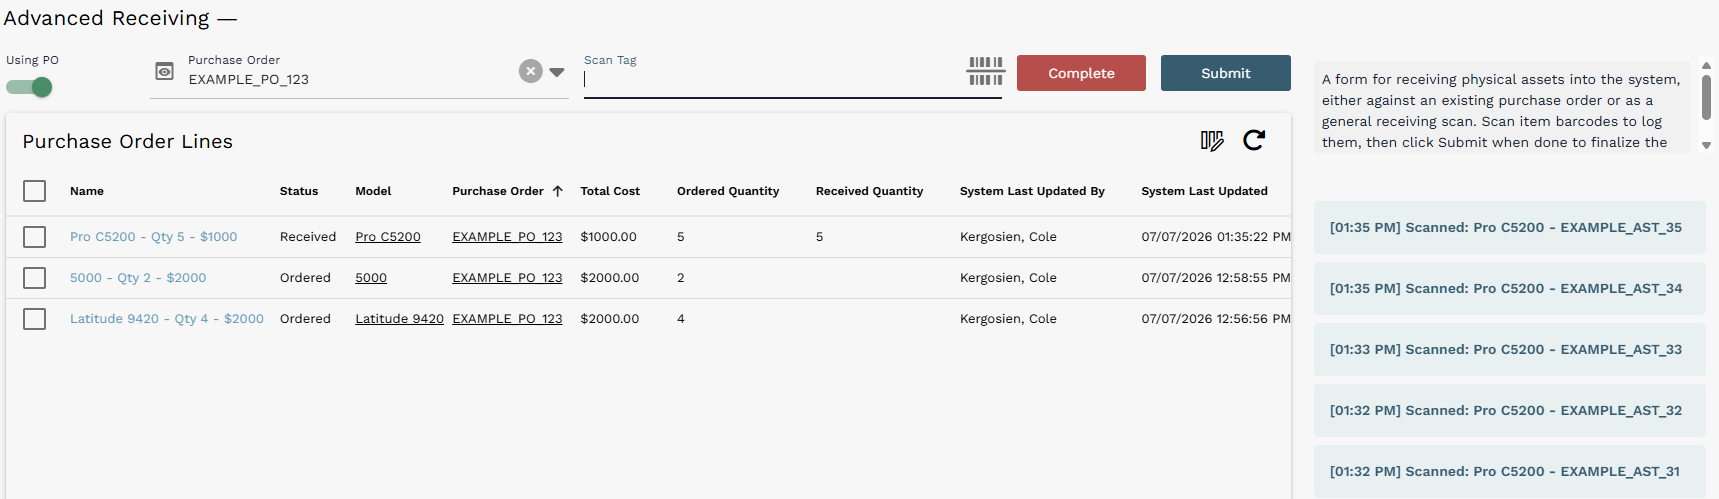
PO Line status changes to Received once Ordered Quantity and Received Quantity match.
When a PO Line is fully received, opening the PO Line Items dialog shows each item under that line in Received status.
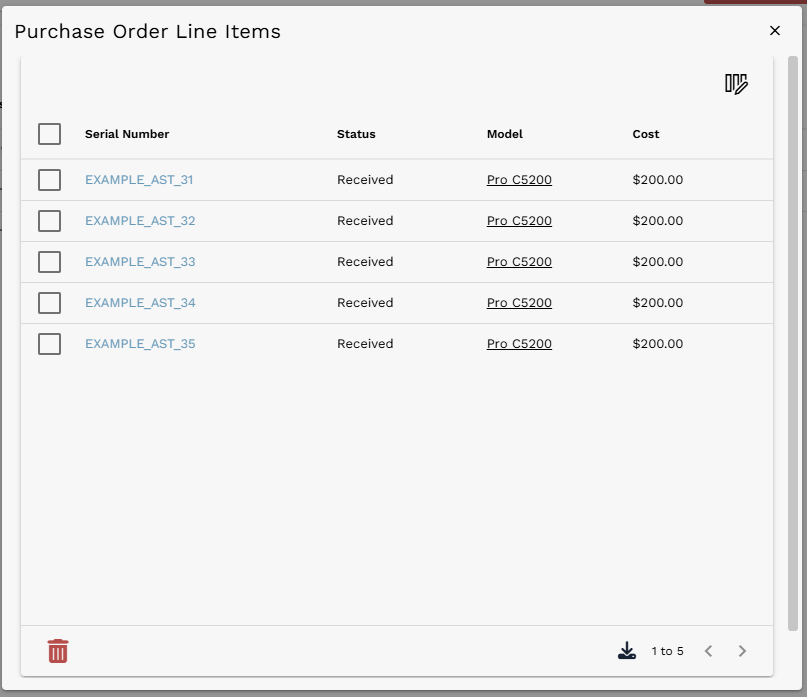
PO Line Items dialog showing all Pro C5200 items in Received status.
¶ Unexpected Items
Sometimes a received item was not entered as a PO Line Item when the PO was created. This can happen when initial PO data was incomplete or a user needs to correct the expected item list during receiving.
In the example, the Latitude 9420 PO Line has an ordered quantity of 4 but only 3 line items. When the user scans an additional serial number, AssetTrack recognizes that the serial number is not already on the selected PO and opens an Unexpected Item dialog.
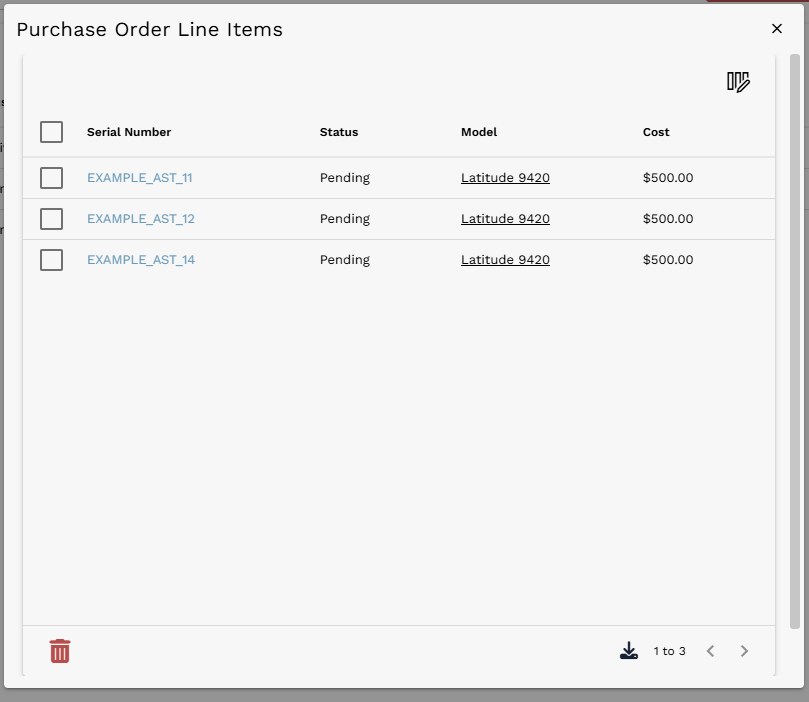
Latitude 9420 PO Line Items dialog showing three pending items, while the PO Line quantity expects four.

Scan Tag field with a serial number that was not already present on the selected PO.
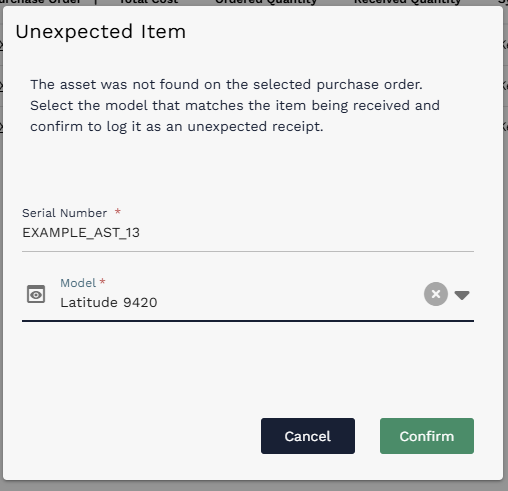
Unexpected Item dialog. The scan tag is used as the Serial Number, and the user selects the matching Model before confirming.
If the selected model matches an existing PO Line under the selected PO, the new line item is automatically placed under that PO Line. If there is no matching model or PO Line, AssetTrack creates a new PO Line under the selected PO to house the new item.
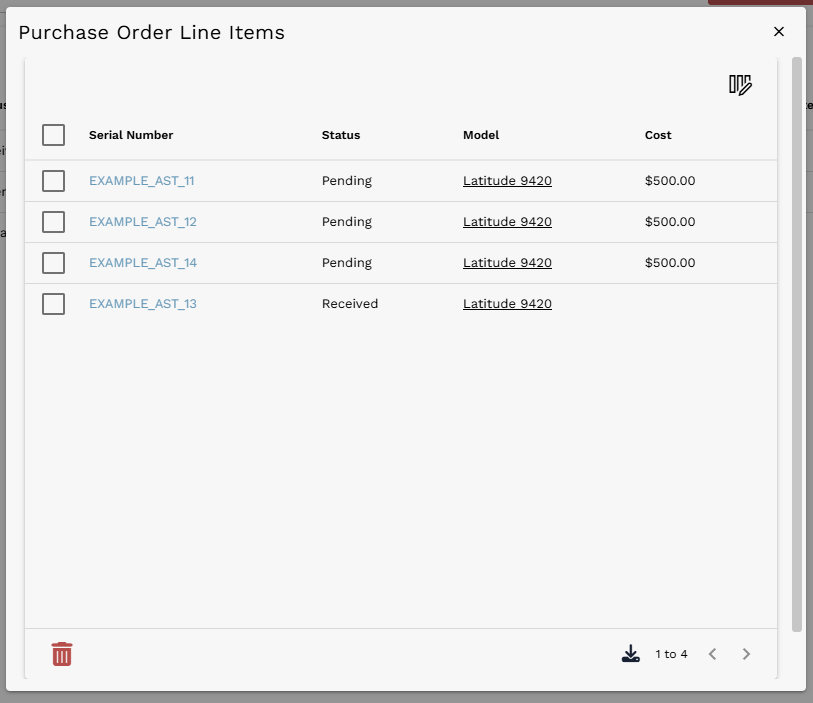
Unexpected item added under the matching PO Line and marked Received.
¶ Over Receiving
It is also possible to over receive on a PO Line. This happens when more line items are received than were initially expected. In that case, the PO Line can show a status of Over Received and the Received Quantity will exceed the Ordered Quantity.
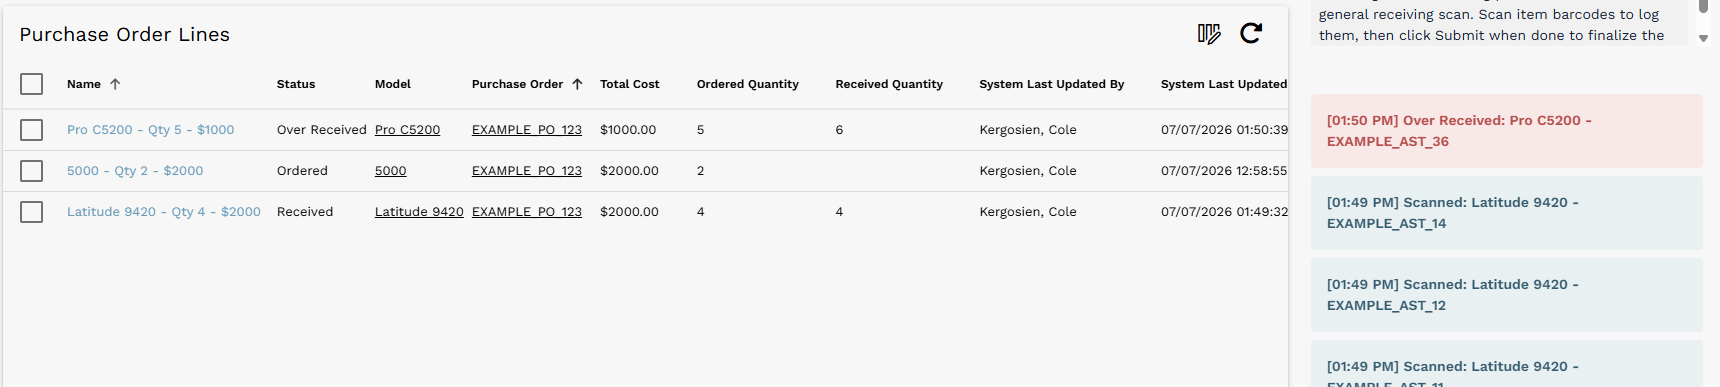
PO Line showing Over Received after more items were received than originally expected.
¶ Submit vs. Complete
When finished scanning the currently received items, select Submit. Submitting pushes the received items to Asset Lifecycle for processing. Depending on AssetTrack Configuration settings, the received items may automatically create assets or may wait for manager approval before asset creation occurs.

Submit button used to process received items for asset creation.
Approval configuration: If receiving requires manager approval in your instance, review the Lifecycle Approvals guide. Submitted items may wait for approval before assets are created.
A submitted PO can still remain active. Users can return later and receive additional items against the same PO if more items arrive in a later shipment or partial fulfillment.
To fully close the PO and prevent any further receiving against it, select Complete. Completing the PO should be done when no additional receiving should occur for that purchase order.
Complete button used to fully close the PO and prevent further receiving.
¶ Verify Created Assets and Lifecycle Events
After submitting, and possibly completing, the PO, navigate to the Asset List to confirm that the new assets were created. Open one of the assets to verify that key information from the PO Line Item was transferred to the Asset record.
A Received lifecycle event is also created and related to the asset. This records the receiving action and provides a history of how the asset entered AssetTrack.
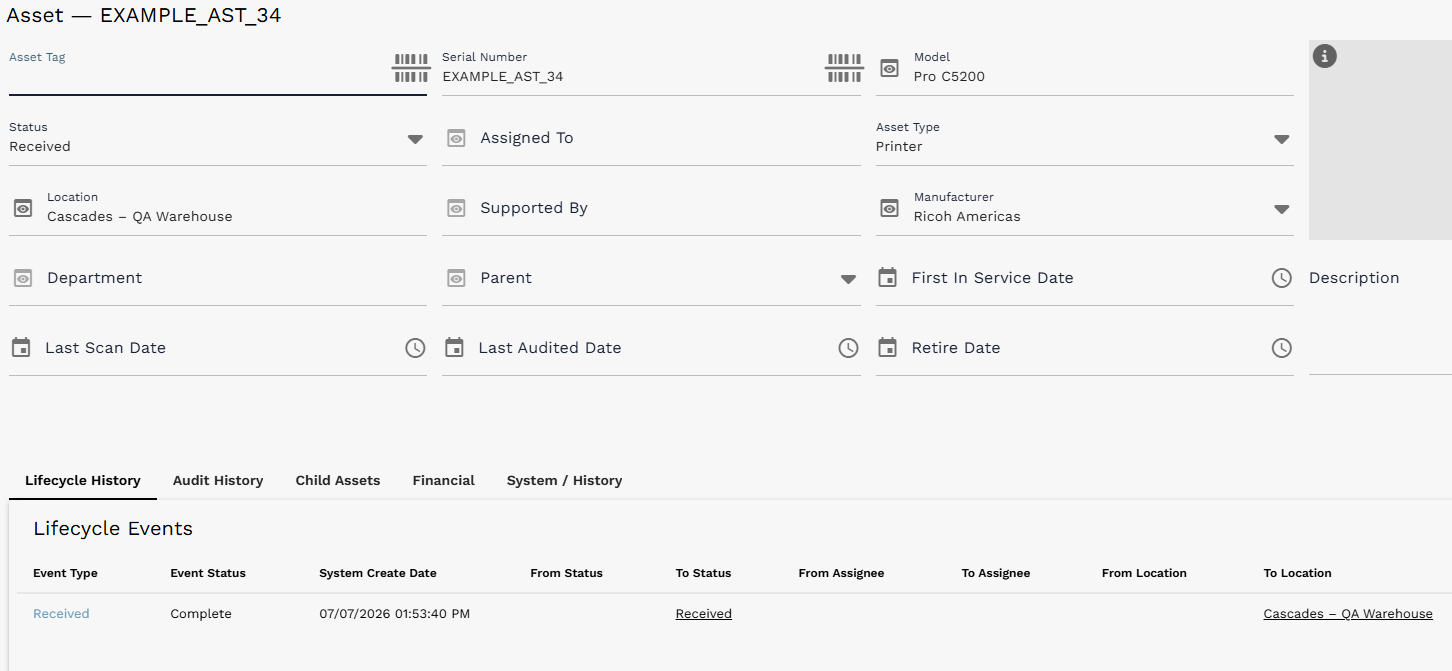
Asset record created from PO receiving, showing received status, location, model, manufacturer, and the related Received lifecycle event.
¶ Purchase Order Receiving Quick Reference
| Task | Action |
|---|---|
| Open PO receiving | Navigate to Receive under AssetTrack and turn on Using PO. |
| Select the PO | Use the Purchase Order reference field to select the purchase order being received. |
| Review expected lines | Use the Purchase Order Lines list to review ordered and received quantities. |
| Inspect line items | Open a PO Line to view its PO Line Items and current statuses. |
| Receive expected items | Scan or enter serial numbers in the Scan Tag field. |
| Handle unexpected items | Confirm the Unexpected Item dialog and select the matching model. |
| Submit received items | Use Submit to send received items to Asset Lifecycle for processing. |
| Close the PO | Use Complete when no further receiving should occur against the PO. |
| Verify results | Open the created assets and review their Received lifecycle events. |