¶ Asset Lifecycle
Standalone Training Guide
Version: 20260605
A focused guide for using the Asset Lifecycle Action page to check in, check out, move, and retire assets.
¶ Contents
- Overview
- Opening the Asset Lifecycle Action Page
- Adding Existing Assets to Selected Assets
- Creating a New Asset from Asset Lifecycle
- Choosing a Lifecycle Action
- Example: Check Out Assets
- After the Action Processes
- Reviewing Lifecycle Results on an Asset Record
- Lifecycle Action Tips
¶ Overview
Asset Lifecycle actions are the common workflows that change an asset during its lifecycle. The most common actions are Check In, Check Out, Move, and Retire. These actions let users update multiple assets at once while creating a related lifecycle history trail for review later.
| Lifecycle Action | Typical Use |
|---|---|
| Check In | Places assets into stock. Requires a location and status. |
| Check Out | Assigns assets to a person. Requires a person and status, with optional location. |
| Move | Moves assets from one location to another. Requires a location and can optionally set a status. |
| Retire | Decommissions assets. Requires a Retire To location and sets status to Retired by default. |
¶ Opening the Asset Lifecycle Action Page
Navigate to AssetTrack > Asset Lifecycle in the left navigator. The page opens a display form labeled Asset Lifecycle Action. At the top left is the Find Asset field. Beside it are the action buttons for Check In, Check Out, Move, and Retire. Below that is the Selected Assets list. On the right side, users may see a list of their past lifecycle actions if any exist.
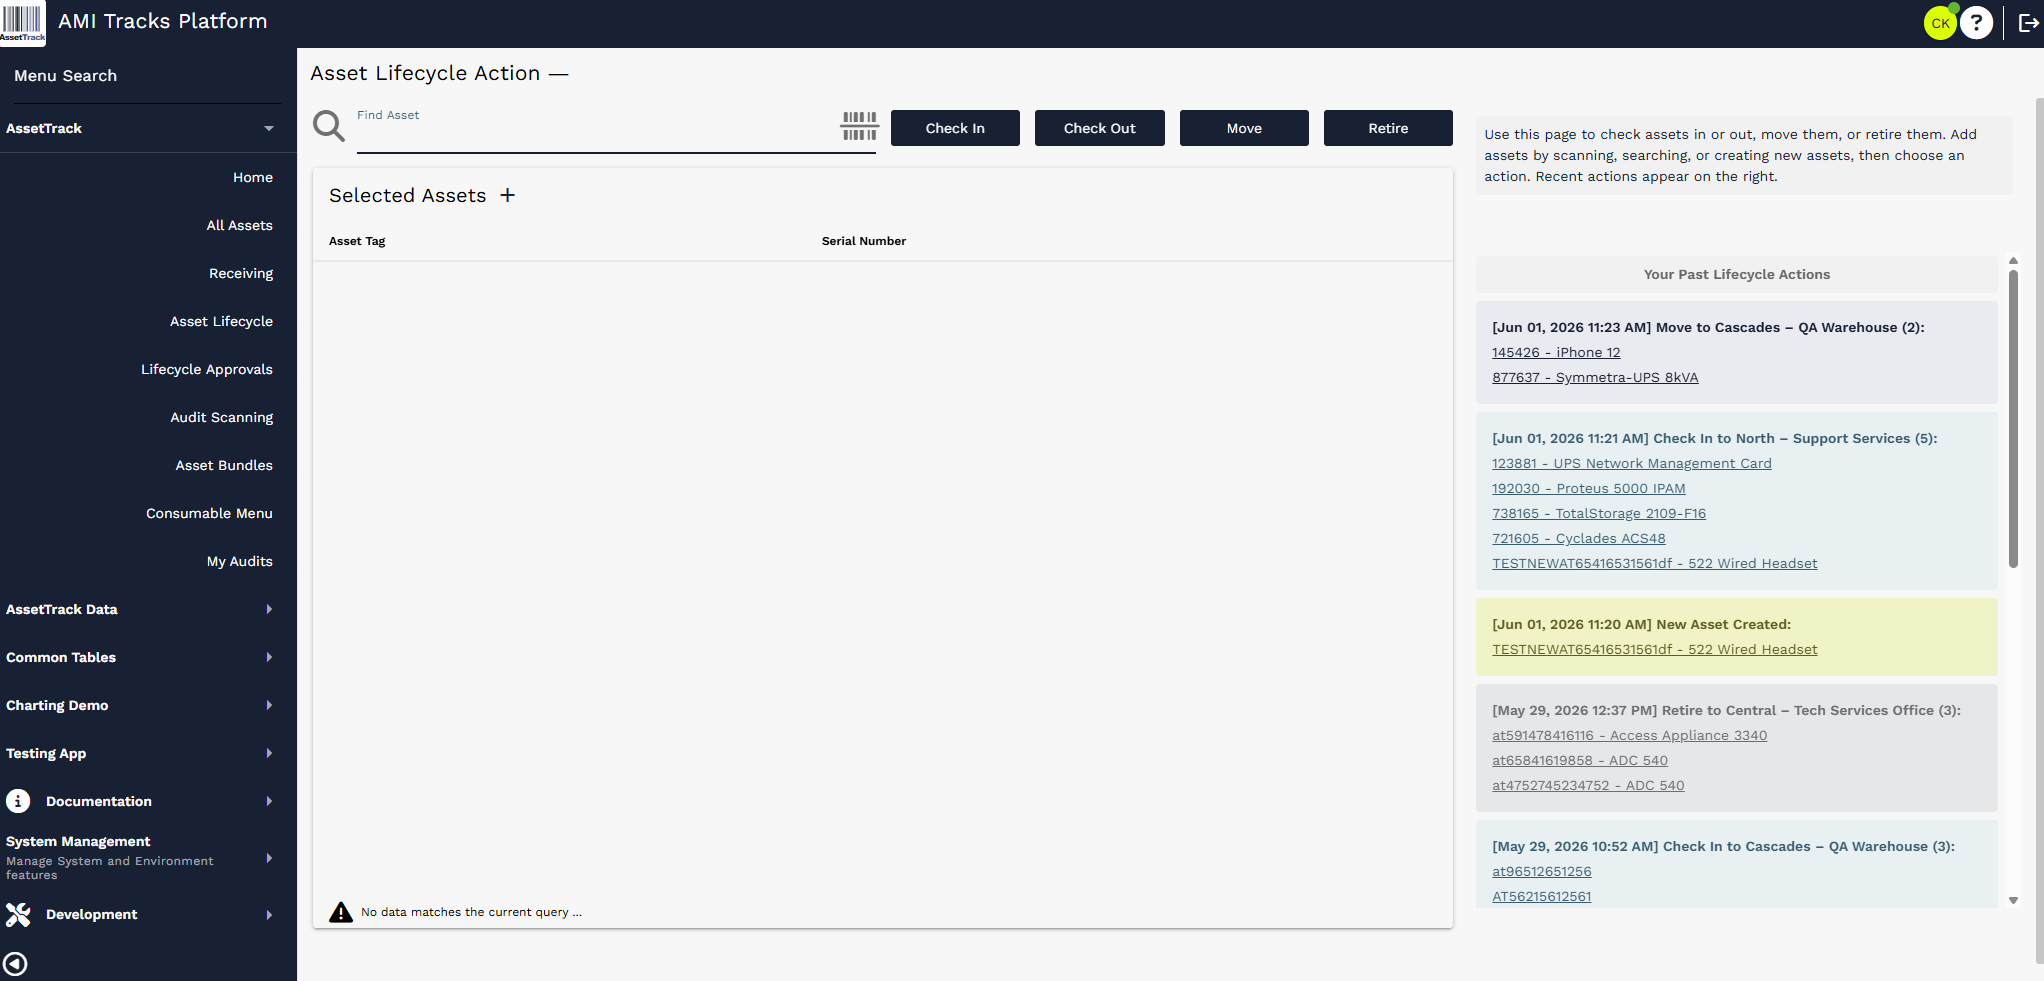
Asset Lifecycle Action page with Find Asset, action buttons, Selected Assets, and past lifecycle actions.
¶ Adding Existing Assets to Selected Assets
Before running a lifecycle action, add the affected assets to the Selected Assets list. Existing assets can be added in three ways: search, scan, or direct entry.
- Search: select the magnifying glass icon to the left of the Find Asset field. This opens a Select one or more assets dialog. Use normal list controls such as the Query Tool, Column Selector, and check boxes to filter and select assets. Select OK to add the selected records to the list.
- Scan: select the barcode icon to the right of the Find Asset field to open a scanning interface. This can be used with a desktop plug-in scanner or, on mobile, a phone camera.
- Direct entry: type or paste an Asset Tag or Serial Number into the Find Asset field and press Enter.
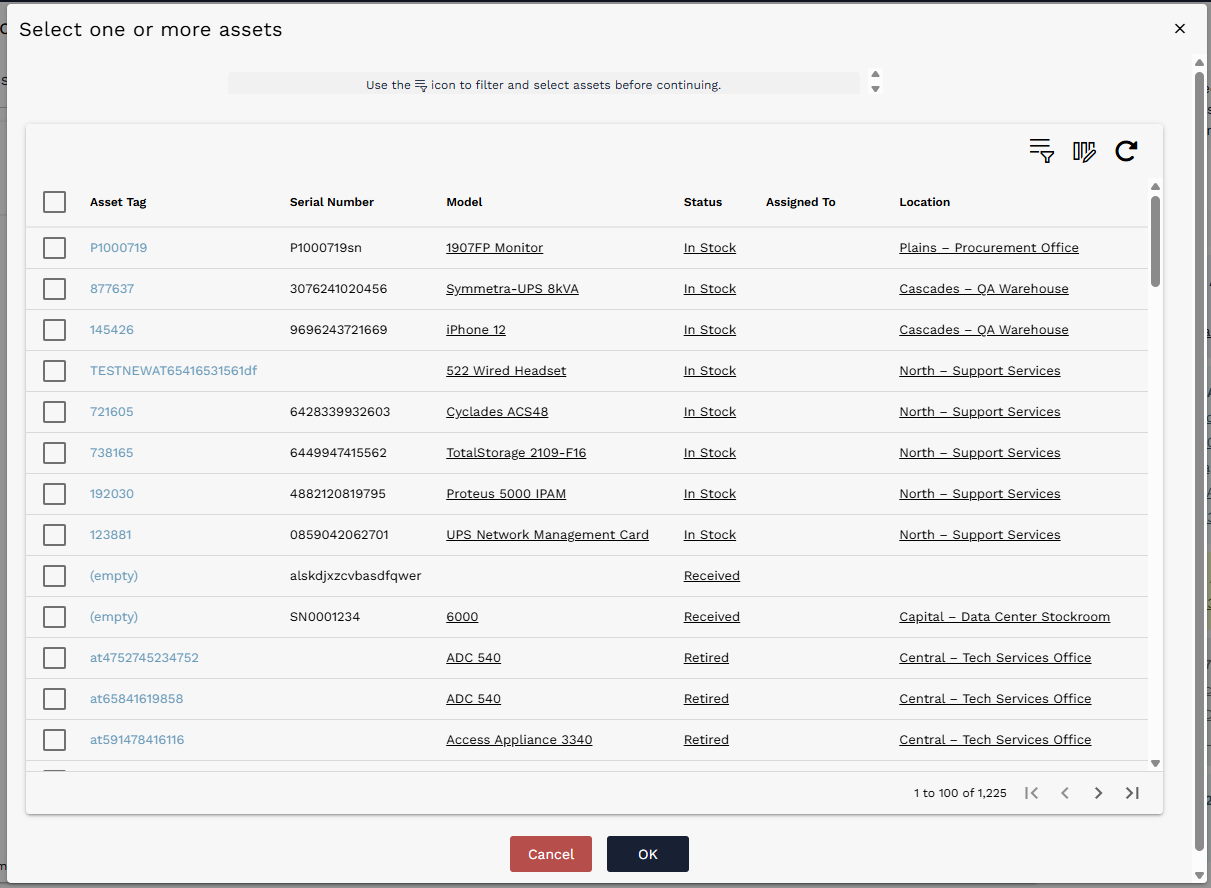
Select one or more assets dialog used to search for existing assets.
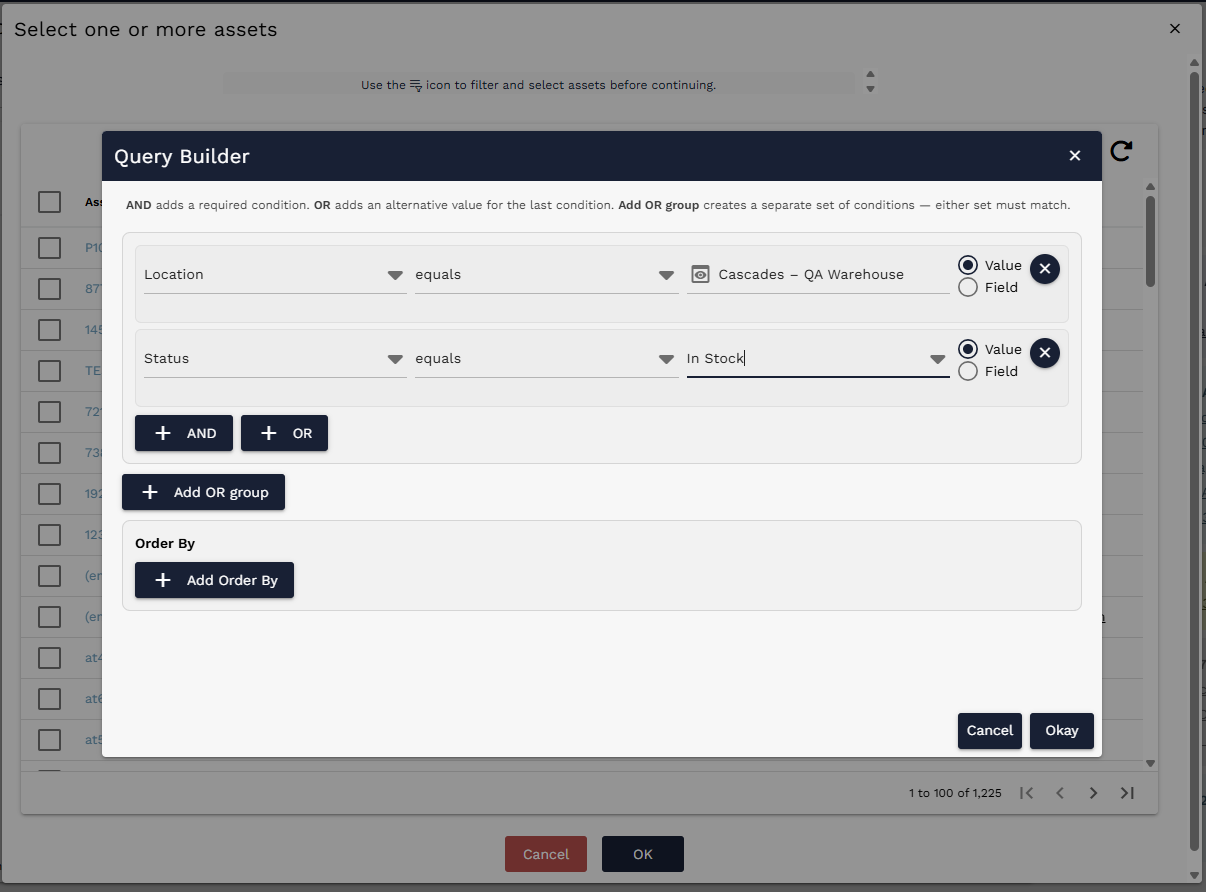
Query Builder opened from the asset search dialog to filter available assets before selecting them.
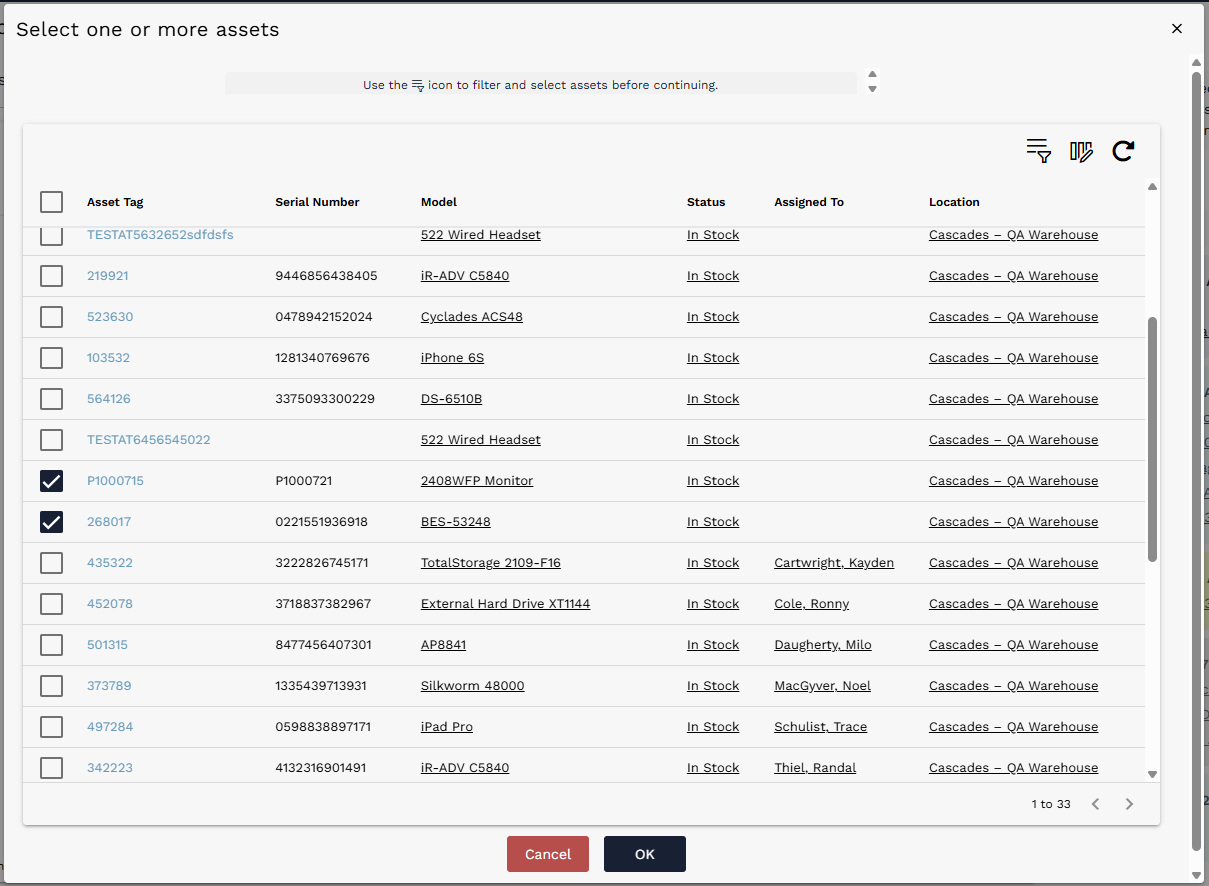
Filtered asset search results with assets selected by check box.

Find Asset field with an Asset Tag or Serial Number entered directly.
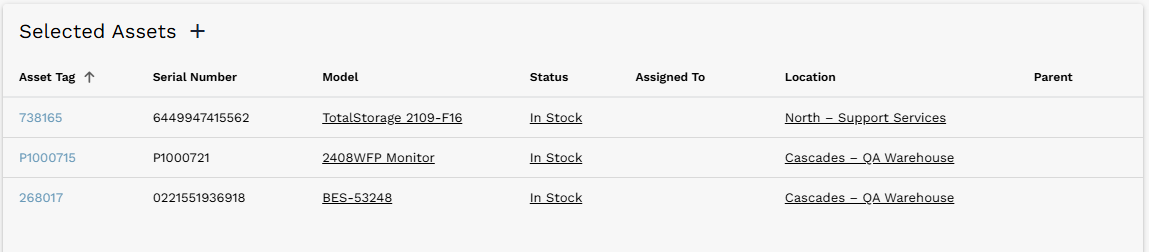
Selected Assets list after existing assets have been added.
¶ Creating a New Asset from Asset Lifecycle
New assets can also be created from the Asset Lifecycle Action page. Select the plus icon at the top of the Selected Assets list. This opens a Create Asset dialog where users can enter the important information needed for initial asset setup.
At minimum, either Asset Tag or Serial Number is required so that each newly created asset has a unique identifier. After the user completes the dialog and selects OK, the new asset is added to the Selected Assets list.
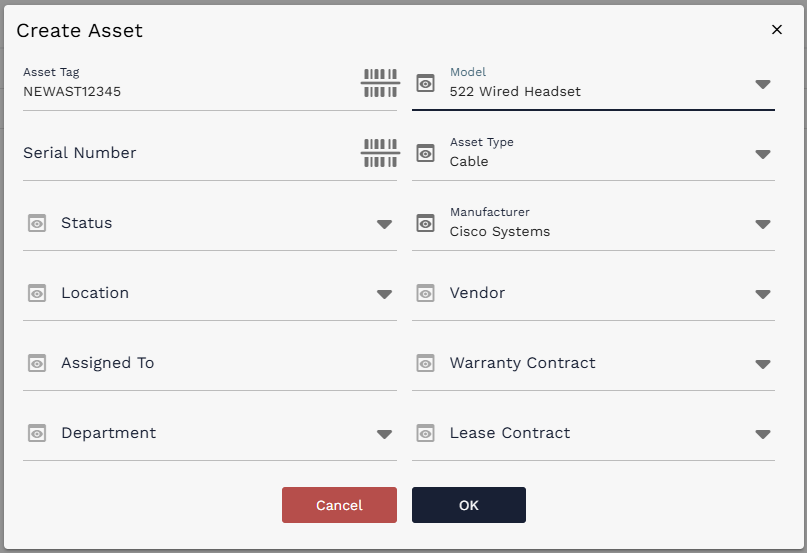
Create Asset dialog opened from the Selected Assets plus icon.
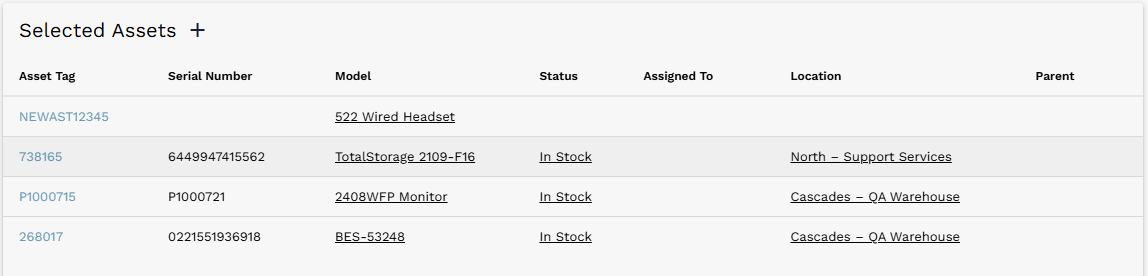
Selected Assets list after a new asset has been created and added.
¶ Choosing a Lifecycle Action
Once all assets for the action are in the Selected Assets list, choose the action type. Each action opens a dialog with fields appropriate for that action.

Lifecycle action buttons: Check In, Check Out, Move, and Retire.
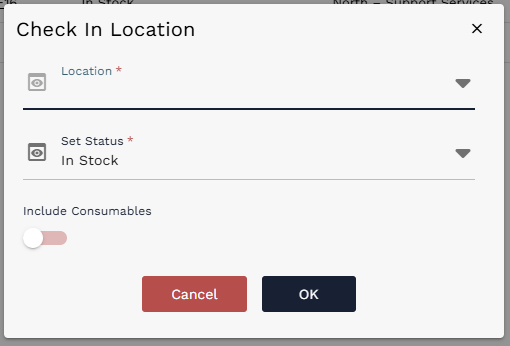
Check In requires a location and status.
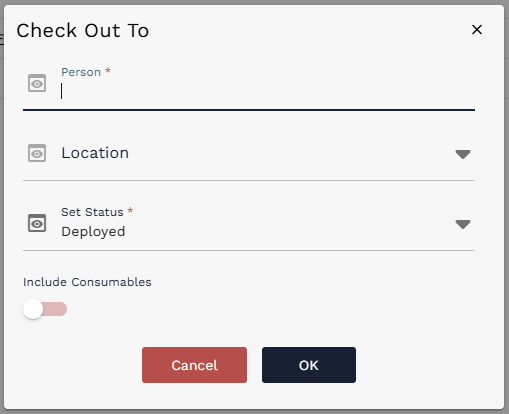
Check Out requires a person and status, with optional location.
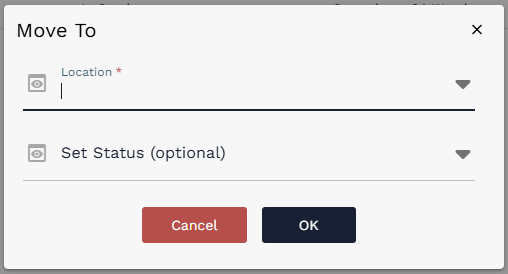
Move requires a location and can optionally set a status.
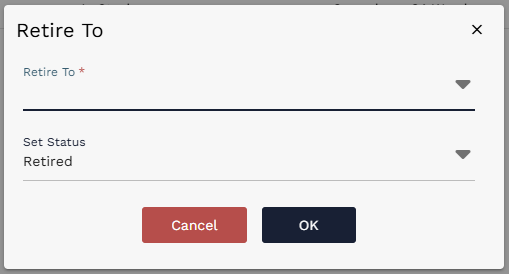
Retire requires a Retire To location and defaults the status to Retired.
¶ Example: Check Out Assets
In this example, we perform a Check Out. Select Check Out, then choose the person receiving the assets. A location can also be selected. The default Set Status value is Deployed. The Include Consumables toggle can be used when consumables should be included in the action; consumables are covered in the Consumables guide. When the required information is complete, select OK.
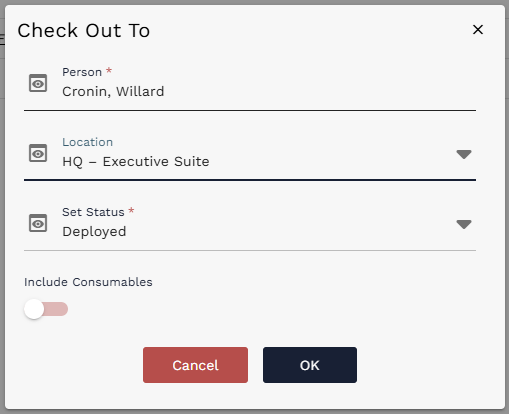
Check Out To dialog with Person, Location, Set Status, and Include Consumables options.
¶ After the Action Processes
After the lifecycle action is processed, three things happen:
- The processed assets are cleared from the Selected Assets list.
- A pop-up message confirms that the action has processed.
- A new log entry is added to the top of the Past Lifecycle Actions list on the right side of the screen.
The log entry shows the time of the action, the action type, the number of affected assets, and a link to each affected asset. Selecting one of those assets opens the Asset record, where users can confirm that the fields changed by the action were updated.

Processing confirmation after a Check Out action.
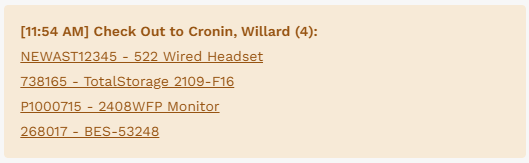
Past Lifecycle Actions log entry with links to the affected assets.
¶ Reviewing Lifecycle Results on an Asset Record
Opening one of the affected assets shows that the lifecycle action updated the relevant asset fields. The asset also shows a new lifecycle entry in the embedded Lifecycle History list. Users can open that lifecycle event record to review what changed and who performed the action.
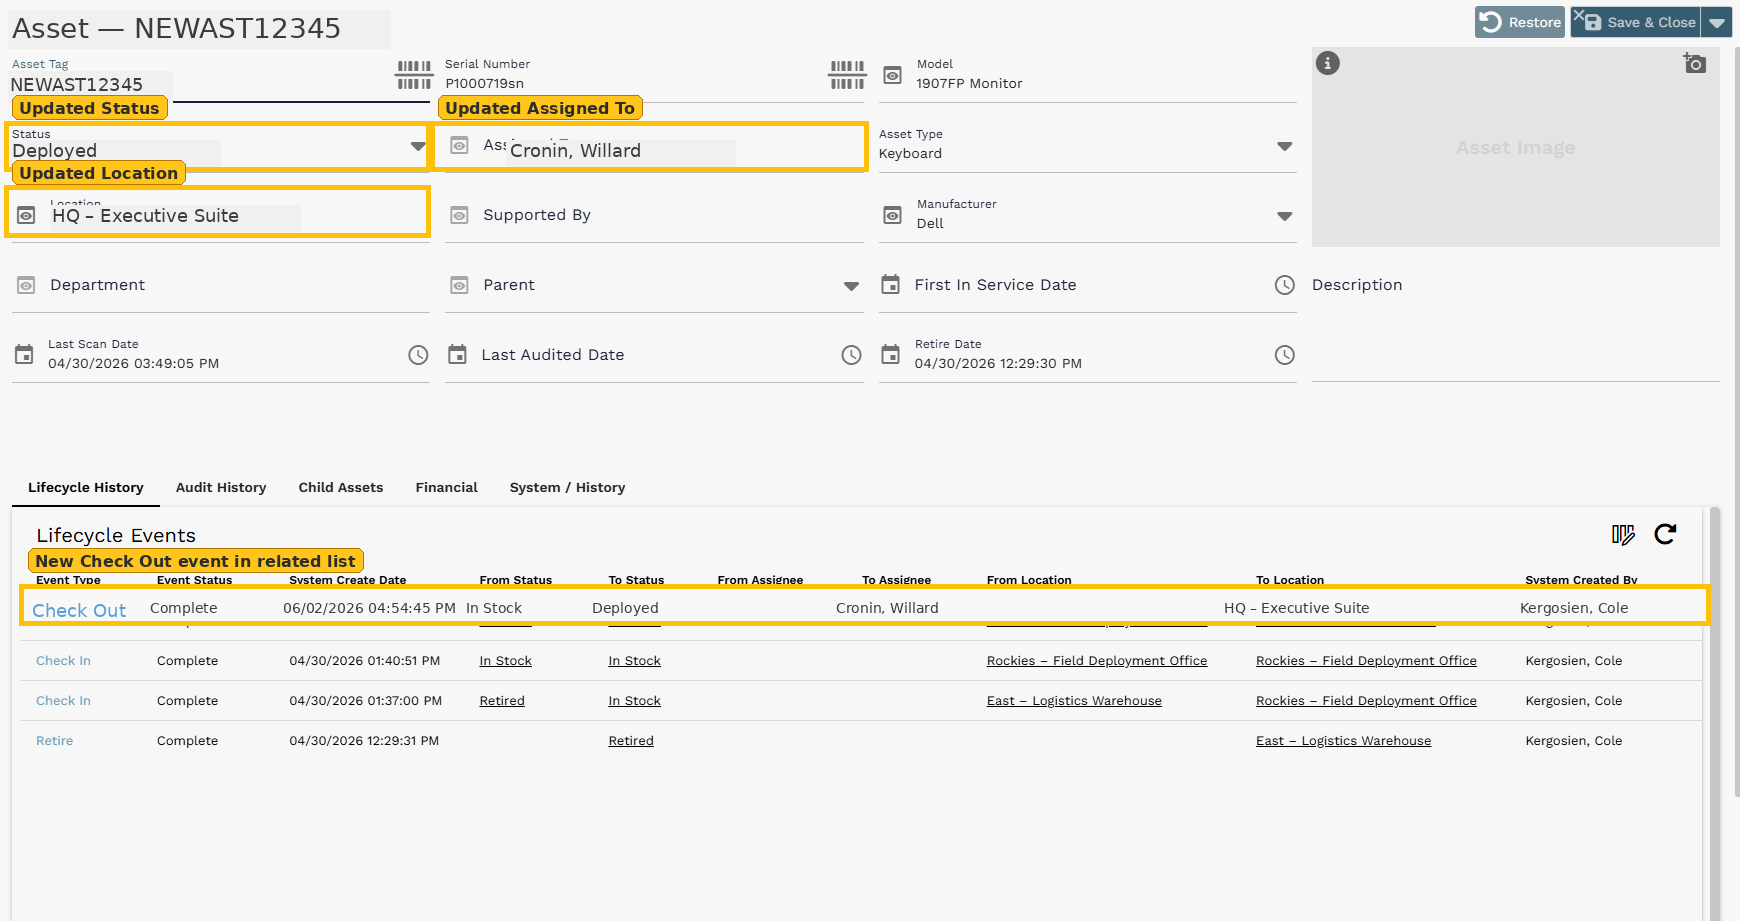
Asset record after Check Out showing updated Status, Assigned To, and Location fields, plus the new Check Out entry in the embedded Asset Lifecycle list.
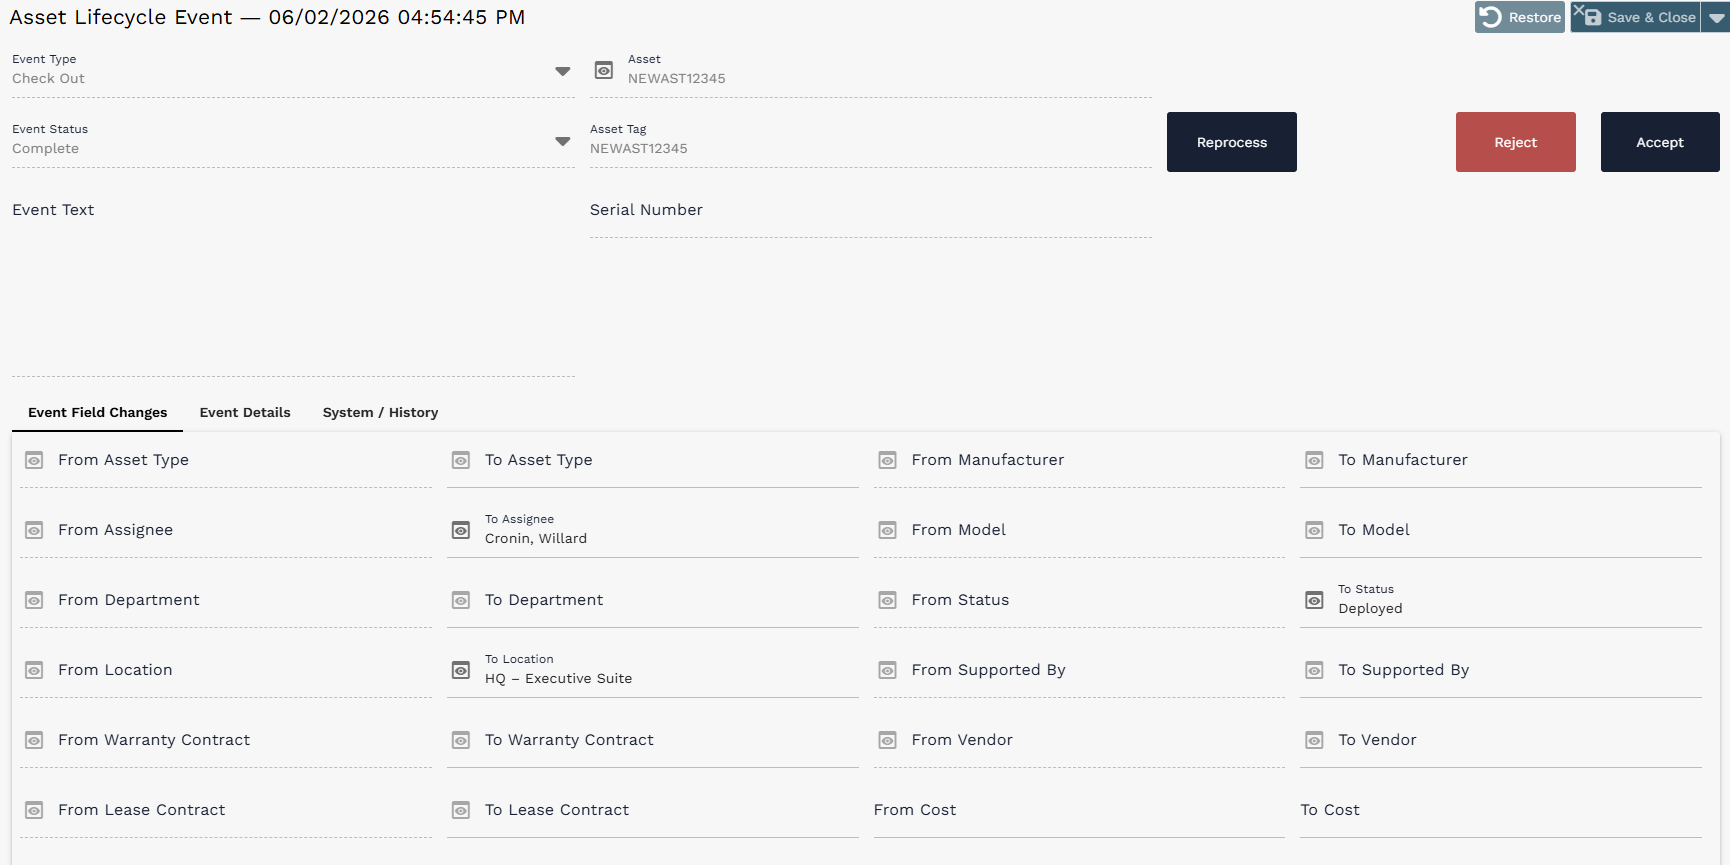
Lifecycle Event record showing the field changes created by the Check Out action.
¶ Lifecycle Action Tips
- Build the Selected Assets list first, then choose the action. This helps prevent accidentally processing the wrong assets.
- Use search, direct entry, or scanning depending on the workflow. Direct entry is useful when you already know the Asset Tag or Serial Number.
- Use the Past Lifecycle Actions panel to confirm recently completed actions and open affected assets quickly.
- Lifecycle history on the asset is the best place to review the before-and-after details of changes made by lifecycle actions.
- If consumables need to be adjusted during Check In or Check Out, use the Include Consumables option and refer to the Consumables guide for details.